What causes heat loss?
A modern metal entrance door is actually a complex structure, where iron is just a shell. The cavities of the leaf can be filled with insulation, since the main function of the door is to retain heat. But there are often heat leaks, not only in private houses, but also in apartments. In addition, inexpensive metal doors have ordinary tin as a body, and cardboard honeycomb instead of insulation.
Reasons for heat loss in the house:
- Thin walls. Walls built in the classical way several decades ago, which do not have insulation, begin to freeze over time. As a result, the thermal insulation of the house deteriorates.
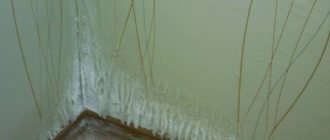
- Cracks and crevices. When a heavy structure shrinks, cracks form on the walls, which over time, if you do not pay attention to them, turn into huge gaps. Such gaps are also called cold bridges.
- Technical openings (old doors and windows). Over time, the wood dries out, thereby forming colossal gaps where the boxes are installed. Windows that are not properly insulated are one of the key sources of heat loss. And a door, if it is made of sheet metal and does not have the necessary insulation, or is of poor quality Chinese construction, with cardboard inside instead of a heat insulator, this is the direct cause of colossal heat loss.
A metal door that does not have proper insulation is a direct source of cold in the house.
Therefore, door insulation is an important component of the thermal protection of the entire house. But before you implement your idea, find out the exact reasons for the loss of heat, so that you don’t end up wasting time and energy on insulating the doors, and the reason for the uncomfortable microclimate lies in the cold bridges formed through the cracks in the house.
Important! The thickness of the iron door leaf is not an indicator of the thermal insulation of the door. A thick layer of metal is, first of all, protection against penetrations and only then a heat insulator (provided that there are no cracks in the structure).
Sometimes heat can be lost not through the leaf, but through the cracks of the iron door frame
How to insulate a metal entrance door
While it’s quite easy to insulate a wooden entrance door even with your own hands, a heavy metal door will require more effort and skill.
Very expensive and high-quality metal doors already have a layer of heat-insulating material. Budget metal doors are often hollow.
Accordingly, if it is missing or to replace it, it is necessary to remove the decorative panel and begin to improve the characteristics of the door.
The first method of insulation is surface. A frame of wooden slats is mounted on top of the door, to which foam rubber or polystyrene is attached, which, in turn, are covered with decorative material. Insulating a door in this way is quite simple, even with your own hands.
The second method is more aesthetic, but also complicated: the door must be removed from its hinges and disassembled. As a rule, even the thickest door is not made from a solid piece of metal, and there are voids in the middle between the stiffening ribs.
To insulate a metal entrance door, it is necessary to fill these voids with a heat insulator such as polystyrene foam, polyurethane or regular foam rubber. Polyurethane foam will also work, the main thing is not to touch the locking mechanisms and hinges. Then the top sheet of metal is attached back.
We must also not forget that the door leaf weighs several kilograms more after insulation, so it is necessary to strengthen the hinges and slopes of the door frame.
If the panel on the inside of a metal door needs to be replaced or is missing altogether, the work package is as follows:
- Take the dimensions of the canvas to cut out the fiberboard panel. The location of the handle and all parts must be marked and cut out on it. You should check the evenness of the location of the peephole, handle, and holes for the door lock.
- Using a sharp knife, cut out sheets of foam plastic the size of which corresponds to the inner perimeter of the door. The thickness must be calculated for installing insulation from the inside of the canvas. The foam is secured using silicone.
- The fixed foam is covered with a fiberboard sheet. Fastening is carried out using self-tapping screws and a screwdriver.
- The metal door has stiffening ribs that are hollow inside. They should be filled from the inside with polyurethane foam. To do this, you will need to make a hole in the metal using a drill and pour the composition through it.
- All cracks and gaps between sheets of foam plastic are also treated with polyurethane foam. The box structure must be equipped with a rubber seal.
It is easy to install mineral wool and foam rubber into the empty space of a metal product with your own hands. Silicone is used as fasteners, and the decorative panel is easily fixed with self-tapping screws.
Choosing insulation
The insulation on the door not only protects the room from the cold, but also insulates the rooms from extraneous noise, which is quite important in apartment buildings. Therefore, when choosing a ready-made door structure, you should inquire about its contents.
Penofol
Penofol is equipped with a foil layer with reflectivity, thanks to which all the heat remains indoors. But, as a rule, it is used only as an auxiliary insulating material.
Rigid (sheet) insulation
Sheet heat insulators (penoplex, polystyrene foam, etc.) are easy to install and low in cost. Since the material is not hygroscopic, it is not necessary to attach a vapor barrier and moisture-proof membrane when installing it.
When choosing rigid insulation, give preference to expanded polystyrene (penoplex). It is much denser and stronger than polystyrene foam, and also insulates more effectively.
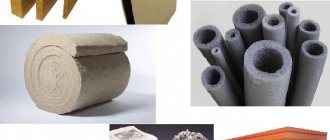
Soft (rolled) insulation materials
Rolled or sheet soft thermal insulators include glass wool and mineral wool. They differ only in the base; their thermal insulation characteristics are approximately the same. The material is environmentally friendly, non-flammable, and allows you to independently choose the installation height, eliminating additional trimming. These advantages make cotton insulation especially popular.
Illustrative examples of heat loss
The material is sold in rolls or slabs. Elements of any shape and size can be cut out of rolled wool, and to reduce the thickness of the insulating layer, simply press and fix the material.
The disadvantage of cotton wool is its high hygroscopicity. The material is afraid of moisture and if the insulation absorbs water, it loses its heat-protective properties. Experts do not recommend using this insulation for doors, since with a high contrast of external and internal temperatures, the likelihood of the insulation getting wet is extremely high. However, the option is quite acceptable for the entrance door to an apartment.
Inflatable (sprayed) insulation
Polyurethane foam fills all the cracks without being particularly expensive. You can spray it yourself, using a foam gun or inviting the help of a specialist using a special sprayer.
Luxury entrance doors
doors are insulated with three types of heat insulators:
- key insulation – polystyrene foam;
- penofol is an auxiliary protection;
- The cavities of the door frame and stiffeners are filled with polyurethane foam
In construction markets you can often see insulation kits for entrance doors. The insulation and finishing material have already been measured and cut according to the standard, but such sets are of little use, since they include thin-layer padding polyester or foam rubber and leatherette.
Do-it-yourself insulation of a metal entrance door
The process begins with the selection of the optimal thermal insulation material, which determines the effectiveness of insulation and its duration.
How to insulate a metal door
Types of insulation:
Penofol
Thanks to the reflective ability of the foil layer, it retains almost all the heat in the room. Used only as additional material.
Insulating a metal door with penofol
Rigid insulation
These include polystyrene foam and expanded polystyrene (penoplex). Their advantage is ease of installation and relatively low price. Since it is not hygroscopic, it does not require additional films. This is the only suitable option for installation in a cottage, country or rural house. Indeed, in this case, the door serves as a barrier to low temperatures and wind, which is not observed in apartment buildings where the door opens into the entrance.
Insulation of a metal door with polystyrene foam and polystyrene foam (penoplex)
Note. When choosing thermal insulation material, give preference to penoplex (expanded polystyrene). It is an order of magnitude denser than polystyrene foam and will provide the door with much more effective insulation.
Soft insulation
This category includes glass wool and mineral (basalt) wool. Their difference is only in the raw materials; in terms of their thermal insulation characteristics, they are not very different. Mineral wool is characterized by environmental friendliness, fire safety, and the ability to vary the installation height without additional trimming.
Cotton wool is sold in rolls or sheets, which makes it possible to cut blanks of the required sizes from it and place them in cells formed by the stiffening ribs of the door itself. To ensure the required height (thickness of insulation), simply press down the material (press cotton wool), the thermal insulation properties will not be affected.
But cotton wool has a drawback that prevents it from being recommended for installation in iron doors for private homes. Because There are different temperatures on different sides of the door, and sometimes the difference is up to 40 °C (-15 outside and +25 in the house). This leads to a shift of the dew point inside the insulation, and the wool gets wet. The effect can be neutralized by installing a hydrobarrier film.
But, nevertheless, professionals do not recommend insulating an iron door with cotton wool in a private house. It can become an acceptable option only if the entrance door to the apartment is insulated, since in this case there is not such a big difference in temperatures (it is much warmer in the entrance than outside).
Insulating a metal door with mineral wool
Inflatable insulation
Presented with polyurethane foam. Spraying makes it possible to fill all the cracks, but has a high price.
Insulation of a metal door with polyurethane foam (PPU foam)
Thermal insulation of luxury metal doors is carried out using three types of materials: foam plastic (main material), penofol (additional), polyurethane foam (filling the voids of the stiffeners and frames).
Note: a set of materials that can be found in stores is of little use for insulating an external metal door, because They use dermantin, foam rubber or synthetic winterizer as insulation.
Additional materials for door insulation
- liquid nails, hardware, polyurethane foam - when insulating with rigid insulation;
- hydrobarrier film, vapor barrier, adhesive tape - when soft;
- sheet of fiberboard, plywood, OSB (for cladding, if the door leaf is non-removable);
- decorative material for finishing: dermantin, MDF panels or plastic panels;
- seal (rubber, silicone).
Tools you will need: tape measure, drill, jigsaw, screwdriver, pencil, stationery knife.
Note. When working with glass wool, you need to take care to protect your respiratory tract, hands and eyes (respirator, gloves, goggles).
Frame structure inside the door (stiffening ribs)
After the door leaf is disassembled, it may turn out that there are no stiffeners in the door cavity, then they will need to be made.
For this, a metal profile or corner with dimensions corresponding to the thickness of the door is used. Its widespread use is due to the fact that it is easier to weld metal to the metal surface of the door.
However, many craftsmen agree that it is better to use a wooden beam, because... Wood has lower thermal conductivity. The difficulty when working with timber is that it is difficult to fasten it securely enough without damaging the front layer of the door leaf.
Insulation scheme for a metal door
Tools and materials
In addition to insulation - the main material, you also need fasteners, cladding, etc.
Polymer seal for entrance door
Table 1. All necessary materials and tools
| Materials | Tool |
| Any selected insulation | Mounting tape |
| Polyurethane foam | Square |
| Hardware, liquid nails or polyurethane foam (for installing rigid insulation) | Pencil |
| Wood-based sheet materials or lining (for covering a non-removable door) | Long ruler or rule |
| Scotch tape, hydro- and vapor barrier membrane (in the case of using soft insulation) | Jigsaw or saw |
| Dermantin, MDF or plastic (as a decorative finish) | Screwdriver |
| Rubber or silicone polymer seal | Spatula and container for putty mixture |
| Universal assembly adhesive (has good ability to adhere to surfaces of different textures) | Foam gun |
| Putty for insulating door frames | Stapler |
| Staples or furniture nails | Hammer |
| Dry wood beams for making the internal frame of the door leaf in case of its absence | Construction knife |
Prices for popular models of screwdrivers
Screwdrivers
Important! If glass wool is chosen as the main insulation, do not forget to take care of protecting the skin of your hands, eyes and breathing organs by using glasses, gloves and a respirator. When working with the material, dangerous microparticles (fiber fragments) are released, which, penetrating into the respiratory tract, can cause long-term irritation of organs.
Video - A simple process of insulating a non-removable Chinese door
Insulation of seams and joints
When the insulation of metal doors is carried out according to all the rules, but the cold still seeps through the cracks, it is necessary to strengthen the tightness of the seams and joints. The gap between the frame and the wall is filled with polyurethane foam. After hardening, all excess that protrudes outside is cut off flush with the door frame. In order for the polyurethane foam to retain its sealing properties for a long time, a layer of plaster must be applied on top of it or covered with platbands: this material is very sensitive to light and quickly deteriorates. In addition to polyurethane foam, rubber or silicone sealant can be used to fill the seams.
Another “gate” for the cold is the place where the door leaf meets the frame. To ensure tightness, the perimeter of the box is insulated with rubber, foam rubber or isolon sealant. The parts can be cut to the size of the door, or you can use ready-made material, which can always be found in hardware stores. The insulation is a tape that has an adhesive layer on one side, so you can insulate a metal entrance door with a seal in a few minutes, but do not forget that the seal, no matter how high-quality it is, wears out over time. It is necessary to check its condition from time to time and replace it as necessary.
We insulate the door frame
The frame of the metal door leaf is made from an iron angle, which is secured in the opening with anchors. After removing the old door structure, large gaps often remain between the mounted door frame and the load-bearing wall or partition. When installing, builders blow them with polyurethane foam, but it has a certain drawback: the material is afraid of sunlight. If sections of the foam are not protected from ultraviolet radiation in time, it will crumble into dust over time.
If the foam on any surface turns yellow or brown, the material is beginning to deteriorate.
The old deteriorating foam from the box must be removed and insulated again
How to do it correctly:
- We clean the wall adjacent to the doorway from the remnants of the polyurethane foam, spread the plaster down to the brick or concrete and remove the dust.
- Spray the surface with plain water and foam the visible indentations. The foam will stick better to the wetted wall.
- When the material hardens, cut off the excess.
Prices for polyurethane sealant
Polyurethane sealant
After this, plaster and paint or whitewash can be applied around the box.
Insulate a door: how to eliminate drafts
Modern entrance doors have a more thoughtful design. Such changes help prevent warm air leaks. For example, three-stage doors have special thresholds that retain heat inside the room. And they don’t let the cold inside.
The question of how to insulate a door is relevant for everyone. And, first of all, for owners of a private home. But those living in an apartment building are also interested in this issue. After all, through the cracks in the doors, cold and cigarette smoke from the entrance penetrate into the apartment. Therefore, an increase in the tightness of the front door worries almost everyone.
If there is a door of a conventional design and drafts are identified, then you should first of all think about how to quickly eliminate them. Below are the options that entry door experts recommend to ensure maximum tightness.
Installing a self-adhesive seal
Using a rubber seal is one of the simplest and fastest options for eliminating this drawback. It's easy to stick it on. Rubber seals with a sticky base are installed around the perimeter of the door.
But there is also a disadvantage of this method. When actively using the front door, there is a high risk of rapid failure of the new seal. It gradually becomes tougher. Mechanical damage appears on it. And as a result: again drafts and cold in the room.
And the slightest distortion of the door frame will lead to the loss of all the qualities of the seal. In a private house, it is difficult to insulate a door that is uneven. What can you recommend? Pay attention to the following interesting method.
Insulating doors with sealant: an alternative option
And an unusual way of attaching the seal will come to the rescue. Below is an image of this installation option.
This method of installing the seal preserves its quality for a longer time. After all, it is the threshold that especially often allows cold air from the street to pass through. And not even the evenly standing door itself will be “saved” by installing an elastic band along the bottom of the frame. Of course, in this case there is a high risk of rapid damage to the seal. After all, he is at risk. What's your recommendation? Use the door as carefully as possible. At least during the seasonal cooling period.
Sealing cord
Installation of the rubber seal is easiest on a sticky base. When we insulate the front door with our own hands, you can also purchase a sealing cord. And don’t let the lack of a self-adhesive layer on it bother you. The trouble-free Moment glue will come to the rescue. He will save you in many household chores. And gluing the sealing cord will not be a problem either.
You should remember the following algorithm of actions:
- The entire length of the door frame is coated with glue. Particular attention should be paid to the place where cold air penetrates;
- a piece of the required length is cut from a common roll of sealant. The joints at the corners are cut at an angle of 45°;
- The seal is also lubricated with glue. The side that will be attached to the door is treated with adhesive;
- after exposure (for “Moment” it is 15 minutes), a sealant is applied to the finished surface. Now the rubber band is pressed as tightly as possible with your hand.
The process of complete drying of such an adhesive sealant lasts a day. Therefore, at this time it is better to use the door minimally. And open and close carefully.
The sealing bead will help insulate the door at the entrance
Metal entrance doors for a private house can be insulated using rollers. They are sold ready-made. You can also make them yourself. The rollers are attached by any method (by gluing, fastening with a construction stapler) along the perimeter of the entire door. Try not to forget any section. This way you will protect your home from cold air entering.
Door sealing rollers can be attached to both the door itself and the door frame. You can even combine both mounting options. This way your front door will definitely be protected from drafts. And the apartment or house is protected from the cold.
What if the door is wooden?
Alas, the wooden entrance door is extremely short-lived. It is very sensitive to the effects of moisture changes. After a few years, cracks and chips appear on it. And cold air passes through them.
Wooden doors are usually replaced. It is better to give preference to modern metal entrance doors. They provide the best protection against heat loss. Their sealing level is maximum.
However, before choosing and purchasing, we recommend that you listen to the advice of professionals. They are especially important during the subsequent installation of entrance doors.
We insulate the door leaf
Before insulating an iron door, the structure must be disassembled. To do this, remove the peephole, door handles, locks and linings.
Before insulation, the iron door must be prepared by dismantling all unnecessary
When the canvas is completely prepared, do not forget to wipe it from dirt and dust before starting work.
Step-by-step algorithm for door insulation
Table 2. We insulate the door
| Steps, description | Photo |
| Step 1. If the canvas does not have additional stiffeners creating an internal frame, the skeleton must be assembled from wooden slats. The frame is attached around the perimeter of the door and along the crossbars using self-tapping screws. It is important to choose the thickness of the beams so that they are not wider than the protruding elements of the door leaf. |
|
| Step 2. We put insulation between the frame beams in the resulting cells. Consider the characteristics of the material and the need for additional membrane insulators. |
|
| Step 3. You can attach the insulation with glue directly to the door or directly to the bars. The most reliable fastening will be provided by combining both methods. We lubricate the door leaf with adhesive, apply insulation to it and press it tightly. If the insulation fits tightly into the frame cell, it means that it will be securely fixed in place. |
|
When the glue dries, do not forget to check the door for cold bridges. the gaps formed between the insulation and the frame with foam, not forgetting to cut it off after hardening.
When insulating a metal door, it is important to cut the insulating material in such a way that the gaps between the heat insulator and the frame elements are minimal or completely absent
Prices for mineral wool
Minvata
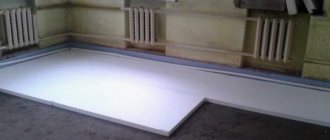
Internal insulation
How to insulate an iron entrance door from the inside? First you need to familiarize yourself with its design. In a standard collapsible design, the insulation layer will be located between the steel sheet and the decorative panel. Internal insulation of a metal entrance door with a non-demountable structure is a more complex process.
Insulation of collapsible metal entrance doors is carried out in the following order:
- Remove from the door leaf all fittings that may interfere with the process of disassembling the structure.
- The structure must be disassembled; to do this, remove the decorative panel to gain access to the internal cavity.
- Remove the old insulation, if there was any.
- All cavities are filled with prepared thermal insulation material. Elements of sheet insulation must be cut with a small margin so that they tightly fill all the voids.
- For a strong fit, the layers of insulation are placed on glue or liquid nails.
- If at the final stage of work an unfilled space is discovered, it is filled with polyurethane foam.
- Next, you need to make sure that there is free space left to install the lock and peephole, after which the decorative panel is returned to its place.
How to insulate an iron door from the inside if the design does not allow for dismantling it? In order not to violate its integrity, it would be better to use an external insulation option. For the internal filling of the cavity of a steel door, granular thermal insulation materials are suitable: polystyrene foam or polystyrene foam balls. The card is cut off at the end of the door, after which the insulation is poured into the internal cavity. To ensure that it is evenly distributed, you should shake the structure from time to time. This method of insulation is absolutely not suitable for doors with anti-burglary locking bolts: loose filler can get inside the system and block the parts.
Clearance seal and door interior trim
Decorating the front door from the inside performs several functions. This is protection of insulation from mechanical influences and other damage, additional heat and noise insulation, as well as a decorative component.
An example of a metal entrance door trimmed with clapboard after insulation
There are a number of requirements for the interior decoration of the door leaf:
- strength,
- moisture resistance,
- durability,
- density,
- external attractiveness.
In most cases, a metal door is sheathed from the inside with laminated chipboard or MDF, plastic or lining, wood or metal, plywood or OSB in combination with leather or dermantine.
External view of the interior decoration of a metal door with plywood and dermantine
Let's consider the algorithm for the internal design of an insulated iron door using the example of using solid sheet materials:
- We cut out a fragment from the sheet to the size of the perimeter of the door leaf frame. It is important that the material does not protrude beyond the sheathing.
- We cut out holes for the peephole, handles and lock secrets in the resulting fragment.
- If you plan to additionally cover the sheet with leather or dermantine, then it is recommended to first upholster the sheet, and then attach it to the door. It is more convenient to carry out upholstery work when the base is in a horizontal position.
- We cut out a solid piece of leather fabric to the size of the base, adding 10 cm on each side.
- We bend the allowances inward and thus attach the material to the base using a stapler. In addition, you can secure the leather with beautiful furniture nails.
- When attaching the fabric to the base, it is important to stretch it well so that unsightly folds do not form. For additional thermal insulation, a small layer of foam rubber or synthetic padding can be placed under the skin. It will also fill the void between the skin and the base and add more appeal to the design.
- When the plywood fragment is completely formed, we coat the door frame with universal glue, apply the plywood to it and fasten it with self-tapping screws with decorative heads (it is important that the self-tapping heads are harmoniously combined with furniture nails).
- We install door handles, locks, peepholes and plugs.
Insulated metal door, covered with plastic after insulation
The final stage is the installation of a polymer seal to prevent drafts from penetrating through the cracks around the perimeter of the door. To do this, the surface of the door leaf and frame is degreased, the protection from the adhesive layer of the seal is carefully removed, the material is applied to the door and pressed. It is important to be careful when installing the seal, as the material is very thin and requires patience during installation.
Video - A budget way to insulate a cheap Chinese door
Step-by-step technique for thermal insulation of street doors with foam plastic ↑
Thermal insulation of street doors made of two-millimeter metal sheet and profile pipe is carried out both from the inside and from the outside. If forging elements were used when finishing the door leaf, then the insulation of the metal entrance door is done with your own hands only from the inside. In this case, various heat-insulating materials are used: insulation and sealants.
Weaknesses in the thermal insulation of iron doors
Cutting a sheet of foam ↑
They begin work with preparatory activities related to measurements of individual structural elements and the acquisition of necessary materials:
- The depth of the cells formed by stiffening ribs made of a profile pipe is measured.
- Buy polystyrene foam of a thickness suitable for this measurement.
- All cells are measured in length and width.
- Foam blanks are cut into rectangular tiles, sparingly using the area of the entire sheet. The slabs are deliberately prepared slightly larger than the measured values to ensure a tight fit of the material into the cell between the profiles.
- Insulation blanks for an iron door are numbered so that you don’t waste time choosing the right part.
Comparison of foam plastic
Placement of foam blanks inside the canvas ↑
Next, they begin to lay the cut pieces of foam plastic in the cavity of the “skeleton” of the door. To securely attach the heat-insulating material to the iron sheet, polyurethane foam is used.
Applying foam with a gun
The work is carried out in the following sequence:
- Take a can of polyurethane foam and shake it vigorously.
- Turn the can upside down and begin to apply foam using a special gun, first around the perimeter of the cell, and then make several parallel foam lines inside it.
- Insert the workpiece with the required number into the cavity, pressing it against the applied foam.
- Move to the next cell, repeating all operations again.
- Then all the cracks and joints between the insulation and the profile, as well as between the composite pieces of foam plastic used to save money when insulating a cell with a door lock, are foamed.
Laying foam plastic slabs in cells
Instructions and video for installing an internal decorative panel ↑
Installation procedure:
- The insulated door leaf is covered from the inside with a single-cut sheet of moisture-resistant plywood, which has a beautiful dark glossy surface that does not require additional finishing.
- To install the plywood sheet, the door is removed from its hinges and placed horizontally on two supports.
- A special U-shaped strip with a pocket into which a plywood sheet and an MDF sheet will be inserted is screwed to the iron frame on three sides (sides and bottom). The size of the pocket is calculated based on the thickness of the plywood, MDF panel and the height of the protruding screw heads.
- Cut from a standard size sheet of plywood and MDF panels of the required size. Insert them into the side U-shaped slats and push them to the bottom pocket, making sure that the sheets fit tightly and evenly into it.
- The top bar is made removable so that, if necessary, you can easily remove the damaged MDF sheet and replace it with a new one.
- The top strip is glued with silicone glue, applying it with a gun to the side of the plywood sheet and MDF panel.
See more details about the method of insulating the door leaf in the video.
https://strmnt.com/www.youtube.com/watch?v=u09lVDvzwso
Video: How to insulate the front door
Important! The finishing MDF material is matched to the tone of the finishing used in the interior. Then the doors from the inside look like interior doors. The similarity is emphasized by a similar door handle.
Thermal insulation diagram
Here's how to quickly and easily insulate an iron door from the inside, making it an integral part of the hallway interior.
Important tips for beginners ↑
Before hanging a sheathed and insulated door on its hinges, do not forget to make a slot for installing the door handle, and it is better to install the accessory itself in advance. Otherwise, you can slam the door and remain closed in the room.
Please note that outdoor insulated metal entrance doors are thicker than the original version. This may result in the key not being long enough to open the lock. The problem is solved by lengthening the key. If you have a lever mortise lock, then the key should be long enough.
Due to the thickening of the door leaf, the square on the latching handle is also lengthened. The connecting rods of varying lengths required to install door handles on both sides are sold as separate door hardware items.
Standard thermal insulation pie
Insulating the gap between the frame and the doors ↑
To prevent doors from blowing through the gap, D-shaped self-adhesive rubber seals are used. Before gluing the sealant, degrease the surface by wiping it with white spirit. Then remove the protective film and press the seal against the door frame around the entire perimeter.
An overlap of two seals is made in the corners, and then both materials are cut at an angle of 45 degrees with a sharp knife. Remove excess pieces by carefully gluing together the edges of the seals that meet in the corner.
Important! In the same way, you can insulate the door to a garage or other utility room with your own hands by removing the decorative MDF sheet laid on top of the plywood from the cake.
Laying insulation
Features of insulation of a metal split door
The algorithm for insulating a metal split door is not much different from the process of thermal insulation of a conventional iron door leaf. The design feature of the door plays a key role here.
Sectional view of a metal split door
The door is removed from its hinges, laid on a horizontal surface, all functional and decorative elements in the form of a peephole, handles, locks and plugs are dismantled, then the internal lining is dismantled (if the product is not monolithic, then the trim is attached with self-tapping screws). In the case of insulation of a non-removable door, the inner lining can be carefully cut with a grinder. When the product is disassembled, cardboard is removed from the cavities and the door is cleaned of any remaining debris and dust.
If there are stiffeners inside the door leaf, drill holes in them at a short distance from each other and fill the voids with foam.
Next, a water barrier is installed, the insulation is cut and attached (remember that some materials do not require moisture protection). The insulation process itself is as simple as in the example with a one-piece door.
The overlay is installed in place. If it becomes unusable after dismantling, the interior design of the door can be replaced. Then the peephole, locks and handles are put in place and the product is installed in the box.
In order not to spoil the integrity of a non-removable Chinese door, it is insulated over the skin
In the case of a monolithic door, if there is no particular desire to spoil its integrity, you can insulate it on top of the existing casing. To do this, a lathing made of timber is attached to the demonstrated and disassembled door leaf from the inside and outside. All further actions are practically no different from the previous algorithms.
How to properly insulate a door frame
Often the cold penetrates not through the door leaf or through the joint, but through the frame. It is made of a metal hollow profile, so it is in no way protected from freezing. It is not difficult to fix such a problem. Prepare everything you need in advance - a bottle of foam (preferably with a gun for more accurate dosage), a drill with a metal drill (select the diameter of the drill according to the size of the tube or tip of the foam gun). Tips for carrying out the work:
- To begin, mark the locations for drilling holes. Make the first about 20 cm from the floor. The rest should be located at a distance of approximately 40 cm from each other. Make them in the middle so that the composition diverges in different directions. Try to place marks along the same line. This will look neater.
- Drill the holes with a drill and a drill bit of a suitable diameter. Go through the box carefully. Hold the tool strictly perpendicular, pressing it with moderate force. To simplify the process, first make small indentations with a center punch, then the drill will not slip.
- Fill the cavity with foam, do it carefully and gradually: if you overdo it, the box may bend. Distribute a small amount, then wait a couple of minutes as the composition gains volume. If he climbs out of the hole, move on and so on until the very top of the structure. To make it easier to remove excess foam later. Lubricate the surface around the holes with a thick layer of Vaseline.
- After the composition has hardened (after about an hour), cut off the excess with a sharp construction knife flush with the surface.
Advice!
To prevent the holes from spoiling the appearance, select plugs of a suitable color and size from a furniture store, cut off the lower protrusion from them and glue them to silicone.
Some people glue insulation to the box on both sides, but it is most effective to fill it with foam from the inside, then you can prevent the structure from freezing. In addition, the door will begin to close more pleasantly, and the clanging sound will disappear. The main thing is not to overdo it with foam so that it does not crawl out of the holes in all directions.
Things to consider
In addition to the thermal insulation of the door leaf itself, the process of door insulation includes other important nuances.
For a better fit of the door leaf to the steel frame, use rubber seals
Polymer sealing tape will help improve the quality of thermal protection of the door. This material is supplied in rolls and sold by the meter. Installing the tape is extremely simple: the seal has an adhesive edge, which attaches it to the door and frame.
Important! Before gluing the tape, do not forget to degrease the surface for better adhesion of the material to the surface.
If the design of the door frame allows, the seal can be glued in several layers
Insulating the doorway itself with polyurethane foam is also very effective. This can be done even if the cavities show no signs of material degradation. Blowing out the voids with foam and then plastering the wall will not be difficult, but will significantly increase the efficiency of insulation.
Also consider the weight of the structure. The weight of a metal door is quite large, and if you add additional insulation and cladding to it, the hinges may not withstand it
The thickness of the door insulated from the outside, as a rule, increases. Take this fact into account when installing locks: they may need to be replaced with designs with extended keys.
The slopes of the metal entrance door also need insulation
Another source of heat loss is indoor door slopes. If they are not completed or sewn up “in a hurry,” they should be given attention. Remove the old finish and fill the cavities with foam. If the space is large enough, fill it with other insulation and secure the trim.
Prices for entrance doors
Entrance doors
Insulating a door in an apartment when it blows through the cracks: useful tips
Most often, the problem is caused by a loose connection of the door frame to the leaf, which is why cold air penetrates inside. It won’t be difficult to eliminate it on your own - there are different options, choose the one that suits you. Most often, you can buy everything you need at the nearest building materials store. Instructions for carrying out work depend on the material used:
- Buy a special door seal. It has a special profile to ensure a tight fit to the door frame and can withstand several years of constant use. Usually this is a double version with a self-adhesive side. Before purchasing, measure the perimeter of the door frame and determine the quantity. Cut a piece on one side with a small margin, start gluing from the corner. Remove 10-15 cm of protective paper from the adhesive strip and, gradually removing it, press the seal, making sure that it is positioned evenly.
- If the seal does not have an adhesive layer, then use improvised means to secure it. It is best to purchase weatherproof silicone and a gun for it. Carefully apply the composition in a line along the entire side where the seal will be glued. Press the piece starting from the corner, gradually moving in one direction. If any, remove excess silicone with a rag or napkin. In this way, you can attach both rubber and felt, if you happen to have it at hand.
- The third option is to use silicone as a sealant. If you have a package of the composition on hand, you can use it to get rid of the gap between the door and the frame. For this you will definitely need a gun. Apply the composition in an even strip around the entire perimeter. You can make 2-3 strips next to each other to make the seal wider. Lubricate the part of the door leaf that will be pressed against the silicone with Vaseline. Close the door and leave for about an hour. Then open it, wipe off the Vaseline, the dried silicone will seal the joint well.
Important!
Find out why the gap appeared. This often happens due to deformation of the door leaf or frame. To find out, measure the diagonals with a tape measure and check the planes with a level.
Regardless of the method chosen, prepare the door frame for work. To do this, remove the old seal, if present, and clean the surface of any glue residue. Then degrease the metal with solvent or any similar compound to ensure the best adhesion.
Common Mistakes
Anyone can stumble: both an experienced installer and a novice home craftsman. When insulating a metal entrance door, there are a number of common mistakes that are most often made.
It is better to insulate a metal door that can be easily opened with a can opener without disassembling it, on top of the inner lining
What to watch out for:
- Season. During the cold period, it is better to postpone door insulation until later, even if there is a very warm entrance or dressing room.
- Ignoring details. The gaps between the frame and the material during insulation, the door frame and slopes also need thermal protection, just like the canvas. If you only insulate the door, the room will not become much warmer.
- Saving. When using natural insulation, you should not ignore membrane films, because otherwise the cotton wool will get wet and become useless. In addition, wet insulation will significantly increase the weight of the door, which can lead to deformation of the fasteners.
A metal door insulated in accordance with all the rules, in addition to providing armor against evildoers, will also reliably protect the house from extraneous noise and pervasive cold. In addition, insulation protects the canvas itself from corrosion and, accordingly, increases its service life. Use the materials that are available to you and don’t be afraid to make mistakes, because only those who do nothing make no mistakes.
Some models of metal entrance doors are already insulated from the factory
Note! If your door has already used up its lifespan, instead of insulation, you should think about a modern solution in the form of a door with a thermal break.
Insulating the front door with foam rubber
If you want to insulate your front door without taking a lot of time and money, use the most familiar, widespread material - foam rubber. It is not suitable for sealing the sides of a door frame, but it can be sewn onto a wooden door on both sides.
To work you will need the following:
- Foam rubber;
- Upholstery fabric;
- Glue;
- Threshold board;
- Slats made of wood and plastic.
Please note: the upholstery material for the door must have water-repellent properties. The optimal solution would be dermantine, artificial leather or sackcloth.
- First of all, cut off the outdated covering from the door and get rid of the remaining insulating materials. Wash the surface thoroughly.
- After the door has dried, stick layers of foam rubber cut exactly to size on its inside and outside sides. If necessary, pieces of foam rubber can be glued together in 2-3 layers (for example, if the material is thin, or you think that additional insulation will not harm).
- Now stretch the upholstery material over the foam, securing it to the door with nails or a staple gun. You can decorate the surface with a pattern of wallpaper nails. Do not overdo it: the nails press and press in the insulation, because of this its heat-saving properties are lost.
- Now it's the turn of the door frame. Stuff slats around the perimeter of the door, which were previously covered with foam rubber and fabric. At the same time, control the position of the closed door: it should fit tightly, without gaps.
- The last stage of insulation is installing the threshold. The threshold board should completely cover the gap under the door, but not interfere with the door leaf opening and closing.
Instead of foam rubber, you can use materials such as polystyrene foam (2 to 5 cm thick) or polyethylene foam. In terms of their heat capacity, they surpass any traditionally used materials.
This simple and economical method will help you quickly insulate your door, further protecting you from extraneous noise.