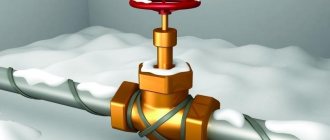
Why is a heating cable needed?
The situation with icicles and pieces of cloth that fall down, demolishing everything they come across in their path, is not uncommon. There are two ways to avoid tragedy:
- constantly clean the roofs of buildings and structures from snow mass;
- install a heating cable for the roof.
The second option is simpler in all respects, but it has one requirement - the presence of electricity as a power source. That is, it turns out that the electric current passing inside the cable turns into heat. The cable heats up and melts the snow. Water slowly flows down the drainage system without forming icicles or ice.
Types of heating cables
Today, manufacturers offer two types of roof heating cables: resistive and self-regulating.
Resistive
This cable was the first invention in anti-icing systems. Essentially, this is a copper core in a plastic braid, on top of which a shielding wire in the form of a mesh is laid (it also acts as a grounding wire). There is another protective plastic layer on top.
Resistive heating cable Source kak-sdelat-kryshu.ru
This variety works like an ordinary conductor, in which the greater the resistance, the more thermal energy is released. From a school physics course we show the formula for electrical resistance:
R = S,
where p is the density of the metal, L is the length of the conductor, S is the cross-sectional area of the cable.
It turns out that the longer the cable, the higher the density of the metal used in its manufacture, but the smaller the cross-section of the cores, the more heat the cable will generate. If the above parameters are accurate, the resistance will be the same for the entire length of the laid section. This means that the resistive conductor releases thermal energy along its entire length in the same amount.
This is not the best indicator for a roof anti-icing system. The thing is that the laid conductor is exposed to snow and ice along its length not equally. In some areas there is a large layer of snow, in some areas there is no snow cover at all. And the heat is lost equally along the entire length of the conductor. That is, the cable cannot itself react to loads by changing the amount of heat generated. Therefore, in some areas heat is wasted. This is the main disadvantage of heating cables for gutters and roofs.
A resistive cable may not cope with the task assigned to it Source stemedcaucus2.org
Resistive cables today are produced in two types: serial and zonal. They differ from each other in design features.
Consecutive
This is one core in a plastic braid, as described above, or a two-core product in which current flows through two wires in different directions. In this way, electromagnetic radiation is neutralized. That is, the safety of operation under voltage increases.
To increase the length of the heated section, pieces of the heating cable are connected in series. At the same time, pay attention to the formula, the resistance of the conductor decreases, which means its heat transfer decreases.
Zonal
These are two-core wires, the cores of which are connected to each other with a nichrome thread. It is wound in a spiral around the wires, connecting alternately to one core and then to the other. The connection is made through special so-called contact windows. Thus, the heating cable for the roof is divided into heat transfer zones.
The advantage of this variety is the ability to cut the conductor into sections that will work independently. In addition, in conjunction with other zones, if one of them is damaged, the others will work.
Twin-core cable for roof heating Source hi.decorexpro.com
Self-regulating cable
If you look at the design of a self-regulating heating cable for heating a roof, it is practically no different from a resistive two-core one. The only addition is the matrix to which the two cores are connected. The matrix is a semiconductor layer that responds to changing ambient temperatures. In this case, first of all, its resistance changes: the higher the temperature, the lower the resistance. Accordingly, less heat is generated.
It turns out that the conductor itself regulates the supply of electric current to one or another area depending on the temperature of the air or snow. This makes it possible to further save on current consumption.
The only negative is the high price. It is 2-4 times higher than that of resistive.
Self-regulating heating conductor Source farfors.ru
See also: Catalog of companies that specialize in carrying out calculations and performing electrical work of any complexity on a turnkey basis.
Types of heating cables
The range of heating cables is small; there are only two types:
- resistive – heating evenly along the entire length;
- self-regulating – responsive to changes in ambient temperature.
Resistive cables
When the electrical circuit is closed, such a cable heats up evenly due to the homogeneous composition of the heating core.
Types of resistive cables:
- Single-core serial - has a primitive design: a wire covered with a shielding braid and a polymer sheath. The braid acts as grounding and reduces the level of electromagnetic radiation. The outer sheath protects the wire from mechanical stress and serves as insulation.
- Two-core series - consists of two insulated cores conducting current in opposite directions, a shielding braid and an insulating sheath. This cable structure makes it possible to neutralize electromagnetic radiation.
- Zonal - consists of two insulated parallel cores and a nichrome spiral, braid and external insulation. The insulation of the current-carrying conductors has windows through which the heating coil closes either on the first or on the second conductor, forming independent heat release zones.
We recommend reading: How to repair a crack in a cast iron sewer pipe yourself
Serial cables cannot be cut, as this changes the resistance of the heating wires and the heating level. These cables are cheap, simple and easy to install, as due to their simplicity of design they are flexible. In operation, the heating circuit is ineffective and susceptible to overheating, since it heats up equally everywhere. A failed cable cannot be restored.
A zone cable is slightly more expensive than a series cable, but overheating of one zone does not threaten a shutdown - the current flows through a parallel zone. It is convenient to install; it can be cut into pieces, but taking into account that the length of the segments is a multiple of the length of the heat-generating zone. Otherwise, the heat-generating zone will be open and the cable will not heat up.
Anti-icing system
Heating gutters and roofs is not just about heating cables. The system additionally includes:
- wire supplying power to the heating element;
- power unit;
- thermostat and RCD;
- fasteners;
- couplings.
The efficiency of the system depends on the thermostat. This device regulates the supply of electric current depending on the ambient temperature. Therefore, temperature sensors are additionally installed in the design. The simplest thermostat is a dual-range one. It only works to turn the anti-icing system on and off.
Wire with thermostat for heating the roof and gutters Source fishing-caravan.ru
A more advanced option is the so-called weather station. It monitors not only temperature, but also other parameters, for example, air humidity, which directly affects the formation of ice on roofs. Weather stations operate based on programmed parameters, hence the good savings in voltage consumption - up to 80%.
Causes of ice formation
Let's take a closer look at the process of the appearance of icicles on the roof overhang and ice in the gutter. There are two reasons:
- The difference between day and night temperatures. This usually appears in the spring season. During the day, under the influence of solar energy, the snow present on the roof melts and flows into the drainage system. A drop in temperature at night causes the formation of ice. If they reach large sizes, the pipe may not support their weight and simply break.
- Operation of a warm roof. In this case we are talking about mansard roofs. Even in winter they are susceptible to the formation of ice. After all, there is a heated room under the roof, and its heat provokes heating of the roof surface. As a result, the snow melts and water flows down the overhang of the roof, and upon reaching the colder eaves of the roof or falling into the same cold drain, it turns into ice.
The organization of a so-called cold roof in combination with proper arrangement of the roofing pie (sufficient thickness of insulation and a properly arranged ventilation gap) allows you to prevent the roof deck from heating up in winter. An alternative, and in some cases an addition to this technical solution, is the use of a heating cable for drainpipes, roof overhangs and gutters.
The heating cable will help get rid of ice on the roof and in the gutter
When choosing a cable heating system, the following factors must be considered:
- architectural features of the roof;
- climate of the region of residence;
- presence/absence of an attic or attic space;
- type of roof covering material;
- roof pie structure.
It is necessary to take into account whether there is an insulating layer on the roof or not, and the quality of this insulation in general.
Important! Installation of a heating cable for gutters and downpipes allows you to completely eliminate the formation of ice not only on the components of the drainage system, but also in other places that are characterized by a high degree of probability of its occurrence. In this case, the functionality of the organized drainage system will be ensured for the entire period during which precipitation in the form of snow and ice formation are possible.
Installation of an anti-icing system
So, we can conclude that a self-regulating heating cable for roofing is the best option, but expensive. As for installation methods, all the varieties presented here do not differ from each other.
- At the edge of the overhang, installation is carried out using a snake, the width of which varies between 60-120 cm. If the roof is covered with metal tiles or corrugated sheets, then installation is carried out along each lower wave.
Installation of wire on the edge of the overhang with a snake Source liderbudowlany.pl
- On valleys, the cable is laid in two parallel sections along the roof element. The distance between them is 30-50 cm.
- The same applies to horizontal gutters of the drainage system and vertical pipe risers.
Installation inside the gutter of a drainage system Source proroofer.ru
It is necessary to pay attention to how the cable should be laid in the receiving funnel - this is the element between the gutter and the pipe, as well as in the drain pipe located at the very bottom of the pipe riser. These two elements are more exposed to loads from melt water than others. Therefore, inside them the heating cable is laid in rings or in the form of a falling drop.
Installation of a heating cable inside the receiving funnel in the form of falling drops Source kareliyanews.ru
Installation Features
Different roof and gutter configurations require an individual approach to the selection of heating cable locations and the shape of the thermal circuit.
We recommend that you read: Features of constructing a convector chimney with your own hands
Main installation locations for the heating cable:
- horizontal and inclined gutters,
- drainpipes,
- roof overhangs,
- junctions with adjacent walls,
- valleys - joints of roof slopes,
The methods of laying the cable in different locations differ: a snake is formed on the planes, straight threads are pulled in narrow and long sections.
In addition to the heating cable, to install a full-fledged anti-icing system you will need:
- power supply and double-braided cold cable to supply power to the thermal circuit;
- thermostat for adjusting the temperature in the circuit;
- a protective shutdown unit to prevent fire in the event of a violation of the integrity of the cable itself or its braid;
- couplings for connecting sections of the circuit;
- fasteners;
- sealant.
In gutters
In the gutters, the cable is pulled in two threads in parallel with an indentation of 10-15 cm.
When the pipe width is up to 10 cm, one thread is pulled through it; as the diameter increases, one more thread is added for every 20 cm.
The laid threads must be secured with mounting tape, steel clamps or placed in plastic clips. Fixing elements are placed every 25-50 cm.
At the ends of the pipe, in order to increase the heating area, the cable is secured in a spiral or a hanging loop is made to drain water.
The places where fastening elements (steel brackets or mounting tape) are attached to parts of the drain are treated with silicone sealant to prevent leaks.
Along the edge of the roof
The method of placing the heating element at the edge of the roof depends on the shape of the roof and roofing material, the presence or absence of a drain. A heating cable snake is laid along the roof surface along the overhang.
The snake is laid according to the pattern of the roofing material:
- for wave materials - the lower points of the snake are attached to the lower points of the roof wave, the upper points of the snake are attached to the crests of the roofing material;
- on sheet materials, the cable is pulled along each seam on both sides of it, and the lower part of the snake is pulled horizontally along the gutter, creating a contour in the form of the letter “W”.
We recommend that you read: Installation of internal and external sewerage systems in a private house
In this case, the width of the contour is selected in such a way as to occupy the area most susceptible to ice formation. Usually 35-40 cm is enough, but in the case of a small angle of inclination of the roof or the presence of an attic floor, the width of the snake can be increased.
Note! In the absence of gutters, the cable is mounted so that the lower end in the form of a loop hangs from the roof, thereby allowing water to flow down without hitting the walls.
Where the roof meets the walls and on valleys
Areas where the roof forms a concave angle are most susceptible to snow and rainwater accumulation. At the slightest violation of the tightness of the cover, moisture penetrates into the structure. Such risk areas include the junction of the roof and the walls and the concave joints of the roof slopes - valleys.
To prevent melt water from being retained, a heating cable is pulled along the connection from the bottom point in two threads, not reaching a third of the top edge. In valleys, the cable is pulled on both sides of the connection line, in the junctions of the wall and roof - 5-8 cm from the wall. The distance between parallel cables is from 10 to 15 cm.
Video description
Video on installing a heating wire on the roof and in the gutter:
Connecting the heating cable
This operation must be carried out carefully.
- Remove the plastic insulation.
- The shielding braid is cut lengthwise, rolling it into a bundle.
- Cut off the bottom insulating layer.
- The matrix is cut to a length of 3 cm.
- The conductors of the supply cable are also cleared of insulation.
- The wires are connected in pairs using a thermal tube. This is a plastic tube into which a heating conductor core is inserted on one side. It is pulled out from the opposite side of the tube and connected to the core of the supply wire. The connection is made by soldering. Then the heat tube is pulled over the joint and heated with a hairdryer. It expands, becomes soft, and after cooling decreases in size, compressing the veins together. The thermal tube performs insulation functions.
Using a heat tube and a hair dryer to connect two wires Source sosyalforum.org
- In this way, two wires are connected. And then two of them are immediately clamped with a sleeve, which will protect the connection from mechanical loads.
The supply wire is connected to an alternating current network with a voltage of 220 volts. An RCD is installed between the connection point and the wire. This device will protect the entire system from stray currents that appear if the insulation of one of the elements of the anti-icing system has been broken. That is, even when a person touches the wires, the current will not strike.
Please note that the anti-icing is a grounded system. Therefore, the shielding braid rolled into a bundle is connected to the grounding conductor of the supply wire in the same way as the wiring. In this case, two conductors (zero and phase) are connected by one sleeve, the grounding circuit by another.
When it comes to network connectivity, the anti-icing system is straightforward. It consumes little electricity, so a regular outlet will be enough. Although other options are not prohibited. For example, to the switchboard via a machine.


