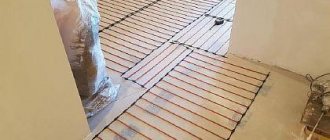
Characteristics of film infrared heating on the ceiling
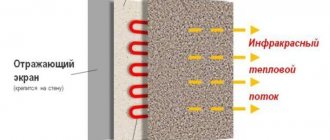
Infrared ceiling heating is a film sheet, inside of which heating elements are located. At the moment when electricity is supplied, this film will heat up to +45 ° C in a matter of minutes. Infrared waves are transmitted in the same way as sunlight. After the decorative ceiling covering is heated, the heat will be directed to the floor, from which it will subsequently be reflected.
Thanks to ceiling-mounted infrared film devices, not only the air in the room will be heated, but also the existing furniture. Thus, heat will constantly accumulate in the living room, which will subsequently be given off from the surface of objects.
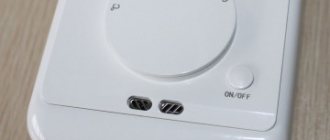
In a room at a level of about 1-1.5 m, it is necessary to install a thermostat, thanks to which the operation of the infrared film heater system, which is mounted on the ceiling surface, will be adjusted.
As a rule, the owner of a residential premises independently sets the level of the desired temperature regime. The moment the set temperature level is reached, the infrared ceiling heater stops working. It should be taken into account that after the equipment stops operating, the process of maintaining the set temperature regime will be carried out. Thus, each time after switching on, the infrared film ceiling heater will operate from the electrical network for about 10 minutes.
Among the technical characteristics, it is worth highlighting the following points:
- the width of the film web can vary from 0.5 m to 1 m;
- maximum thickness is 1.2 mm;
- maximum temperature heating of installed elements – +50 °C;
- required voltage – 220 V;
- weight 1 sq. m of infrared film heater is 50 g.
Many people believe that by installing this type of heating, the floor surface will be constantly cold. It is important to understand that by heating objects, the lack of heat near the floor will be compensated.
What are the advantages and disadvantages of infrared flooring?
Heating film has many advantages, thanks to which it is in demand everywhere and is used not only in apartments and private houses. The advantages include ease of installation, since there is no need to lay a concrete screed.
The advantages include the ability to combine a heated floor system with any type of flooring, for example, ceramic tiles and even carpeting, with a minimum film thickness that will not affect the floor level.
The main advantage of infrared flooring is that it is easy to install
There are also advantages:
- Low heating inertia, due to which rapid heating of both the film and the room occurs.
- Wear resistance to increased loads on the finish.
- Uniform heating of the room.
- Wear resistance to sudden temperature changes.
- Optimal cost.
- Opportunities to significantly reduce electricity consumption when heating a room by 30%.
- Possibility to install heating on the wall.
- Low intensity electromagnetic field.
Also relevant is the absence of a detrimental effect on human health, the ability to eliminate unpleasant odors from the room, and the elimination of dry air in the room, which allows you to create an optimal microclimate. Installation, connection and dismantling is easy, simple and quick, and therefore there is no need to contact qualified specialists.
Types of ceiling film infrared heaters
If we consider the types of infrared film heaters that exist today, they can be divided into 3 groups depending on the mounting method:
- ceiling models;
- wall models;
- floor models.
Depending on the wavelength and temperature radiation, infrared films are:
- low-temperature - household models of heaters that heat up to +10 °C - +60 °C, the emission length of infrared waves varies from 5.6 microns to 100 microns;
- medium temperature - in this case, the temperature range is +60 °C - +100 °C, while the wavelength ranges from 2.5-5.6 microns;
- high-temperature - the temperature range exceeds +100 ° C, the radiation of infrared waves is 0.74-2.5 microns.
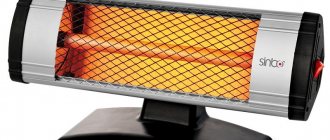
At the moment, ceiling heating elements are the most popular. Such models can be used as an additional or main heat source. It is quite difficult to reach such elements, which eliminates the possibility of getting burns, especially if there are small children in the house.
If the installation work is carried out correctly, the process of heating the ceiling surface will be uniform. Thanks to the attractive appearance of modern models, infrared ceiling heaters will only complement the interior design.
Advice! If necessary, you can install a ceiling PLEN in a living room.
Where can heaters be located?
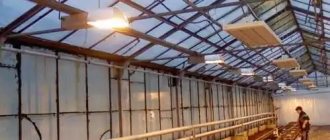
Infrared heating of rooms is organized by separate heaters or film surfaces, which are mounted in the floor, walls or ceiling. Ceiling heating (film on the ceiling) is popular due to its analogy with solar natural heating. Radiation directed from the ceiling is evenly distributed over the surface of the room and causes heat transfer from all objects in it. Furniture, dishes, walls, and baseboards become heating radiators.
Despite the ceiling location of the heating source, the warmest zone is located near the feet. Since the ceiling is free of any objects, it can be completely used for installing infrared film.
For floor and wall heating, the film is installed only where there is no furniture or household appliances. On the one hand, this reduces the cost of heating installations, on the other hand, it reduces the amount of emitted energy.
Ceiling heating PLEN
Warm ceiling PLEN has a number of significant advantages:
- since the device runs on heating electricity, energy costs are minimal;
- a distinctive feature is a high level of reliability and a long service life - the conductors are sealed in film, the design is completely free of wearing elements;
- PLEN can be installed under a coating of any material; its installation does not require much space;
- Thanks to the automated system, it is possible to set any temperature regime.
It is worth paying attention to the fact that the work is carried out silently, with no heat losses at all. The manufacturer provides a warranty of up to 25 years, the service life is 50 years. During operation, ceiling heating does not require maintenance.
Installation of infrared ceiling film
In the event that this system will act as the main source of heat, it is recommended to first attach mats to the surface, which will occupy about 80%. If an infrared ceiling heater is used as an additional heat source, then it is enough to install mats on 30% of the total area of the entire ceiling surface.
Before starting installation work, you must first correctly calculate the power level of the heating elements. Thanks to the power calculation, it will be possible to select a thermostat. For example, a thermostat consumes 4 kW per square meter. m of film accounts for 0.2 kW. In this case, the surface area should be up to 20 square meters. m.
After this, they proceed to the installation of thermal insulation materials. If you plan to install an IR heater in a multi-story building with a concrete floor, then heat loss can be prevented thanks to thermal insulation. In wooden houses, thermal insulation prevents heat dissipation and, as a result, drying out of the wood.
For insulation, you can use foamed polystyrene, which is covered with a layer of foil on one or both sides. The material should be attached to the ceilings using refractory dowels for this purpose. It is recommended to seal the joints with foil tape. Only after this can you begin to install the film ceiling heater.
When attaching the infrared film sheet, you must first step back about 35 cm from the walls along the entire perimeter. A distance of up to 5 cm should be left between the strips. The infrared film should be located on the ceiling surface parallel to each other. During the work, it is recommended to follow a special scheme, according to which heating elements should not be located above sleeping places and electrical appliances.
After all the elements have been secured, it is worth checking the functionality of the system. To do this, you need to connect the terminals to the copper busbars and clamp them tightly using pliers; the connection points must be reliably insulated.
To connect infrared film sheets to each other, electric copper wires are used, which have a minimum cross-section of 2.5 square meters. mm. If necessary, the wires can be disguised; to do this, a groove is made in the walls using a hammer drill, which is then sealed with plaster.
Attention! If necessary, you can install infrared heated floors on the ceiling.
Features of ceiling heating systems
Installing film heaters on the ceiling allows you to obtain the following operating scheme. When the device is turned on, it emits infrared waves aimed straight down. The radiation goes towards the floor and is most absorbed by it. The remaining waves affect furniture and other interior items. As a result, they all begin to work harmoniously and then give off heat. The maximum temperature in the room will be at floor level. At a height of 1.7 m it will be several degrees lower. This temperature distribution is ideal for human health and well-being.
If you want to combine a suspended ceiling and PLEN, then experts advise additionally installing a protective layer of plasterboard. It will absorb the remaining heat, and the stretched film will remain unchanged. Another advantage of installing film heaters on the ceiling is the minimal risk of their sudden deformation.
Coating IR film for ceiling outside
When choosing IR film for heating a room, you need to pay special attention to the quality of the system, which must meet a number of basic parameters:
- the base must be made of high quality film, the polymer used must be fireproof;
- the conductive strip must be undamaged and made of copper materials, the minimum permissible width must be 15 mm;
- the silver strip must have a clear outline, without gaps, and it must overlap the copper bus by 2 mm;
- the arrangement of carbon emitters should be striped or solid; geometric shapes do not have any effect on the operation of the ceiling heating system;
- the external lamination of the infrared film must be made of the same polymer as the base; it is not recommended to use materials with a smaller thickness;
- standard films must withstand temperatures up to +80 °C, high-temperature materials - up to +110 °C;
- if high quality materials were used in the production process, then there should be no deformation during operation;
- high-quality IR film should heat up evenly in a short period of time - about 5-10 seconds.
As practice shows, the wider the film, the lower the likelihood of it overheating during operation.
Important! If the polymer is transparent, then it deforms much faster during operation.
