The history of the appearance of the Insulated Swedish stove
In Russia, for 20 years now, a number of companies have been offering to build an Insulated Swedish Slab , although this foundation has nothing to do with the Swedes. This type of foundation ( FROST-PROTECTED SHALLOW FOUNDATION ) was first used by Frank Lloyd Wright for his home in 1902 , and then for economy class residential developments in the Chicago suburbs during the Great Depression in 1930. Particular emphasis was placed on cost-effective design . In the 50s, the Scandinavians became interested in the technology and built several houses on FPSF to accumulate data. The experiment was so successful that by 1972, more than 50,000 houses had been built on this type of foundation in Sweden alone. Around the same time, the Royal Norwegian Society allocated a grant of about $10 million to create a Scandinavian interstate fund for a more detailed study of the issue. Freezing Processes in the Soil was published . Based on the results of the Frost I Jord project, since 1978, the Norwegians began to publish national SNiPs regarding FPSF.
By the end of the 20th century, more than a million houses were built with FPSF in Scandinavia. The insulated slab foundation has gained particular popularity thanks to the ideas of the “passive house”. The Americans themselves now admit that the Scandinavians have creatively reworked and significantly enriched the practice of using FPSF and have now themselves introduced the rules for the construction of insulated shallow foundations into their construction code. Particularly noteworthy is the fact that in the Scandinavian version this type of foundation is an integral solution of the foundation itself, the installation of the first floor floor, low-temperature heating and the communications input-output system.
Advantages and disadvantages of the USP design.
Advantages of a foundation design based on the type of insulated Swedish slab:
- The insulated base and blind area prevent soil freezing and, as a result, heaving.
- Good thermal insulation and a built-in underfloor heating system in the structure allow you to achieve good savings on heating.
- The stove is an excellent heat accumulator that will allow you to survive a power outage (here we mean electricity not as an energy carrier, but as powering all pumps) even for several days.
- The slab is a subfloor onto which finishing materials can be directly laid without prior preparation.
- Insulation and waterproofing of the slab prevents the formation of moisture and mold in the house.
- There is no need for additional floor screed (all communications are embedded in the slab).
- Allows you to build houses in areas with high groundwater levels and on almost all soils.
- A monolithic foundation (slab) has a low shrinkage coefficient.
Swedish USP studies
Since there is too much speculation and misunderstandings in the RuNet about the insulated shallow foundation, we present here studies conducted in Sweden in two different cities with different freezing depths and the conclusions drawn from these studies, as well as recommendations for the construction of USF.
USHP: expensive or not?
The disadvantages of this foundation include its high cost. Indeed, USP from specialized companies costs an average of 9,000 rubles. up to 11,000 rub. per m2. That is, the cost of a foundation with an area of 100 m2 is approximately a million rubles. This is a lot of money! But let's look at an alternative option, which at first glance seems budget-friendly. We choose a different type of foundation for a stone house, for example, a strip foundation. We add to it the cost of drainage, insulated blind area, all engineering systems, ground floor slabs, heated floors and leveling screed, as well as the costs caused by the stage-by-stage implementation of work (involving specialized specialists for each operation, multiple purchases and deliveries). As a result, the total costs will be significantly higher than the costs of USP. If you have to pay 1 million rubles for USP, then the “tape” with all the “extras” made by a specialized company will cost 1.3 - 1.5 million rubles. You can view projects of aerated concrete houses and request a full estimate for them in the YTONG free projects catalog
What are the advantages of USP?
[1] High speed of construction of the structure in 2-3 weeks. The duration of the work depends on the area and geometry of the slab: the larger the size and more complex in shape of the foundation, the longer it will take to construct it. Weather conditions also play a role: during heavy rain, it is better not to pour concrete. [2] Possibility of installation on almost any soil, including with a high level of groundwater and heaving soils - clays, loams. Thanks to the insulation, the ground does not freeze, which means the foundation is protected from deformation due to frost heaving of the soil. However, USP cannot be done on soils with very low bearing capacity, for example, peat bogs. In this case, settlement of the foundation is possible. [3] No deep excavation required: savings on excavation work. [4] All communications are ready at the stage of foundation construction. This significantly speeds up the construction of the house. [5] High energy efficiency due to thermal insulation layer. This means low building heating costs. USHP with insulation 200 mm thick has a thermal conductivity coefficient of 0.17 W/(m•°C). For comparison: the thermal conductivity coefficient of a conventional monolithic concrete slab, as a rule, exceeds 0.40 W/(m•°C)
[6] There are no cold bridges in the slab design and no freezing of the lower corners of the building thanks to a continuous layer of thermal insulation under the foundation and an insulated blind area. [7] Heating with water heated floors is 20-30% more economical than radiator heating, since the radiators are supplied with coolant at a temperature of about 70°C, and the heated floors are supplied with a temperature of about 40°C. In addition, warm floors heat the room evenly, creating very comfortable temperature conditions for the inhabitants of the house. Finally, the absence of radiators improves the appearance of the premises. [8] There is no need to install a screed on top of the slab: the surface of the foundation is leveled and sanded and serves as a ready-made base for laying the floor covering. This means that when finishing the premises you can avoid additional wet work.
[9] There are no seams in the slab (compensation gaps are required in the screed), which simplifies the installation of the floor covering.
Concrete floor base without concrete screed
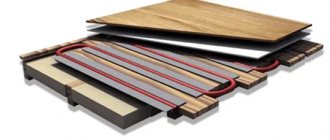
If we are talking about installing a heated floor without a concrete screed, then the base in this case is ordinary wooden boards or sheets of chipboard and OSB. It is recommended to use products whose thickness starts from 20 mm. Installation of the wooden system is carried out as follows:
- the bearing surface is leveled;
- the waterproofing film is laid out;
- wooden planks are laid out;
- metal plates are laid between the slats;
- the plates are secured with self-tapping screws;
- pipes are laid in the grooves of the plates;
- the plates are covered with a waterproofing film;
- the entire structure is covered with GVL sheets.
We recommend: How to install heated floors under porcelain stoneware?
It is advisable to use floor structures as a base for heated floors in the following cases:
- the height of the room is limited;
- there are weak overlaps. Even a small concrete screed can weigh several hundred kilograms, which will put strong pressure on the interfloor partitions, which can lead to their collapse;
- For one reason or another, it is impossible to implement a concrete screed at the site.
What are the disadvantages of USP?
For all its advantages, this design also has disadvantages: [1] It is problematic to install USP in areas with a slope. In principle, this is possible, but the site will need to be leveled by adding sand, and this is a very expensive undertaking. [2] It is impossible or unreasonably expensive to create a basement or cellar in a house located on the USP. [3] Communications are laid inside the slab, and therefore their repair in the event of an emergency is either impossible or difficult.
Dmitry Andriadi, head of the BAUHAUS company: “If water is poured into the underfloor heating system integrated into the USHP, and in winter it freezes during a power outage, the pipes will break and it will be impossible to repair them. You will have to dismantle the floor covering, install a new heated floor on top of the existing one, perform a screed, and lay a new floor covering. Therefore, it is better to initially fill the heating system with antifreeze. But if the heated floor is damaged, for example, when drilling with a hammer drill, then local repairs are quite possible. As for the pipes of water supply and sewerage systems, accidents that could completely disable them are unlikely.”
Let us note a few more features of USP. One- or two-story houses are most often supported on such a foundation. But if there is a well-thought-out design calculation, it is possible to construct a USP under heavy buildings (more than two floors) or under houses with an uneven load (when part is one-story and the other is two-story). USP assumes a low base. The height of the foundation is usually 300-400 mm. This is convenient, because at the entrance to the house you can make a staircase just a couple of steps high. The most comfortable, almost barrier-free environment. This solution is especially relevant when elderly people or people with disabilities live in the house. If you absolutely need a high base, you should prefer another Scandinavian know-how - an insulated Finnish foundation (UFF). This is a shallow strip foundation with insulated floors along the ground. The solution to the problem of a low base within the USP is to increase the thickness of the sand cushion and/or the thermal insulation layer under the slab. But these are additional costs.
Stages of constructing a USP foundation
The technology for constructing a foundation with a heated floor differs significantly from traditional strip foundations, and even more so from modern pile foundations.
Preparatory work on the ground is of great importance in the construction of a USP foundation. To understand the entire construction cycle, we list its stages, based on the construction technology of the specialized company Rekonst LLC.
Stage 1.
The area must be level. The top layer of soil, 300-400 mm, needs to be removed. The result should be a flat area for further construction.
Stage 2.
Marking out the site according to the construction project.
Stage 3.
The construction site should be slightly higher than the surrounding area. To do this, add a layer of sand to the area and level it.
Stage 4.
At the site, according to the project, the sewerage system of the house and the drainage of the site are being installed. Sewer outlets in the house and storm drain points must be prepared.
Stage 5.
Now comes the specific stage of constructing a slab foundation. A special tamping machine is used to tamp the sand and grind it. Tamping is carried out in vibration mode with water poured over the sand.
Stage 6.
According to the project, formwork is installed, removable and non-removable. The formwork is backfilled.
Stage 7.
Layers of geotextiles, waterproofing and rigid insulation made of extruded polypropylene are laid across the construction site. The latter does not react with cement mortars.
Stage 8.
Reinforcing mesh or reinforcement is laid on top of the insulation, with cells of 100 by 100 mm.
Stage 9.
The laid fittings will serve as the basis for laying the water-heated floor pipes. The pipes are laid according to the design with the pipes leading out to the installation sites of the heated floor collectors. Sleeves are placed where pipes pass through partitions. There can be several collectors.
Stage 10.
The final stage is to pour concrete onto the prepared site, creating a foundation with a warm floor.
The result is a ready-made foundation for further construction. The foundation already has a heating system for the house. The stages of installing in-house and storm sewer systems have also been completed.
Range of application and circuit features
Each project requires an individual calculation of the foundation depending on the characteristics of the soil, the weight of the house, the ratio of the building area to the length of the perimeter, the characteristics of the climatic zone and other factors.
To generalize as much as possible, the Finnish foundation of the design considered can be recommended for use in all climatic zones of the Russian Federation for all categories of soil with an approximate load of 1 - 3 tons per linear meter of MZLF.
The specified range of loads corresponds to most projects of frame houses with 1 - 2 storeys and one-story cottages without limiting the type of their construction. However, adapting UFF to heavier houses is not a problem: changing the design in this case occurs by increasing the cross-sections of the cushion and base of the strip foundation.
Typical design of MZLF - shallow strip foundation
In economic terms, the scheme is only suitable for buildings without basements.
Among the advantages of UFF are:
- An elegant and simple solution to frost protection
- High energy efficiency indicators, only slightly inferior to a scheme such as an insulated Swedish stove (USP).
- Good adaptability to changes in projects in terms of loads, base height, sequence of individual stages, maintainability of laid communications.
- The ability to carry out work with little effort and little money, taking significant breaks in time (for example, you can do without formwork, and it is permissible to work on heating installations and cast the floor slab after the roof has been installed).
- The option adapts better to the slopes of the site than USHP.
- The scheme can be used at high groundwater levels
Features of USP device technology and differences from UFF, find out in this detailed material at the link
The (largely conditional) disadvantages of this type of foundation are associated with insufficient energy efficiency in relation to the “passive house” concept and a significant amount of excavation work. The cost of the cycle when implementing schemes close to Omatalo technology is 100 - 120 $/m² of construction plan.
The option is more expensive than the standard zero cycle. However, if you take into account the insulation and wiring of communications, the Finnish scheme is a little cheaper.
A technical and economic comparison with USHP gives the following results: with a plinth height of 80 cm and above, the option is 10% - 15% more expensive than an insulated Swedish stove. The height of the plinth significantly affects costs, since it is directly proportional to the volume of backfill materials delivered to the site.
It should be noted that replacing extruded polystyrene foam with polystyrene foam (while maintaining the thickness of the heat-insulating layer) does not significantly reduce the cost of the project (the total amount is reduced by no more than 2% - 3%). If we assume the same level of energy efficiency, taking into account moisture absorption, then insulating the floor with PSB-S slabs is more expensive than using EPS.
Main types of insulated foundation
Most often there are two types of base:
- USP foundation technology;
- shallow structure;
USHP system
USP (insulated Swedish plate) is a shallow cast slab base. The structure is insulated around the perimeter and over the entire area of the sole. The Swedish stove forms the finished subfloor of the building, which is immediately equipped with a heated floor system.
USP
Reference: extruded polystyrene foam is used as a thermal insulation material. This insulation is designed specifically for insulating the base from below.
Thanks to the addition of graphite elements to polystyrene foam, its compressive strength and resistance to sunlight are increased. Plus, the material is practically not subject to shrinkage, and the thermal insulation of the sole allows you to cope with the problem of soil heaving.
USP foundation technology is ideal for frame and other types of buildings. Its use is very appropriate in the construction of one- and two-story houses. The design allows you to cope with several problems at once. The Swedish foundation is a kind of “pie” consisting of layers laid according to a certain pattern. The order of laying layers is agreed upon when developing the project:
- the soil;
- geotextiles;
- drainage outlets;
- layer of sand;
- layer of crushed stone;
- thermal insulation;
- frame made of reinforcement;
- heated floor system;
- concrete base.
Help: when building a foundation on sandy soil, it is not necessary to include drainage in the design. The danger of flooding appears most often during snow melting, but during this period the sand also thaws. As a result, water seeps into the ground through the loose structure.
For high-quality operation of the structure, it is necessary to calculate the Swedish plate. Thanks to this, it will be possible to ensure uniform heating of all areas of the floor covering, determine the maximum and minimum power of the heating system, calculate the level of operating temperature that will need to be set during operation, as well as the level of heating of the concrete surface at it. Engineering calculations are made based on load indicators, load-bearing characteristics of the structures being constructed, and the type and condition of the soil.
Shallow design
Note: the technology for insulating the finished structure will be discussed below.
A warm, shallow-type foundation is built above the freezing depth of the soil. This is the reason for insulating it both horizontally and vertically. This design will serve as a barrier to the outflow of heat from the room, and will also protect the soil from freezing under the base itself.
Shallow base
Expanded polystyrene is also used as insulation, which, even with a minimum thickness (5 cm), provides high-quality protection of the foundation from freezing.
Important: the highest heat loss occurs in the corners of the building, so the thickness and width of the thermal insulation layer in these places should be greater than in other parts of the structure.
Advantages characteristic of both types of foundation
+ High energy efficiency, heating inertia, which is important for frame houses
+ No underground space, does not require maintenance throughout its entire service life
+ Comfortable microclimate at home, absence of convection currents and high-temperature heat sources
USP advantages
+ high energy efficiency
+ high degree of availability of engineering communications
+ finished zero level of the building
+ convenience of subsequent work on the installation of the house frame
+ economical consumption of concrete when compared with other slab foundations
USP cons
- not a high base
— technological complexity of execution
— significant costs for preparing a building site with a large difference in height in the building site
- impossibility of building a basement
- significant financial burden at the first stage of building a house
UVF pros
+ high energy efficiency
+ the possibility of stage-by-stage installation of the foundation and floor, which reduces the financial burden at the first stage of construction
+ the ability to install engineering systems already “under the roof” in a finished house, regardless of the weather
+ possibility of organizing a high base
+ proven installation scheme based on MZLF
+ possibility of installation with significant height differences
UVF cons
- separate tape for all internal load-bearing walls, if any
— higher consumption of concrete compared to USHP
Insulated foundation with warm floor
Often the choice of a home heating system is postponed until the construction of the house itself is completed. When the house is already standing, they choose the type of heating, select equipment and draw a heating scheme according to the layout.
Due to its widespread use, this approach can be called traditional. The design of such houses is simplified; the house design can even be purchased ready-made. Construction costs are divided into stages, which is also convenient. However, the total amount of completed construction is greater than some options for modern construction technologies. We are talking about the technology of an insulated slab foundation with a built-in water heated floor system.
By design, an insulated foundation with a heated floor is a concrete slab laid and covered on all sides with dense insulation. When building a foundation, a drainage system for the site and the house is immediately created. This allows it to be used at high groundwater levels.
Also, when constructing the foundation, a system of water-heated floors is installed in it. That is, already at the stage of building the foundation, two important tasks of comfortable living are solved: heating the house and its drainage. This reduces the time of the full construction cycle, although it slightly increases the cost of construction.
Let us immediately note that a USHP foundation with a heated floor requires individual design, based on the condition of the soil, the depth of groundwater and the load of the house on the foundation. In addition, heated floors require separate design.
Area of possible application of UVF
When considering the technical characteristics of the foundation of a Finnish slab of insulated construction, we can talk about its acceptable use in all climatic zones of Russia, for any type of soil during the construction of buildings with a weight load of up to 3 tons per 1 linear meter of strip foundation.
This characteristic will correspond to the majority of frame-type buildings being erected with a height of up to 2 floors.
When increasing the support cushion of a strip foundation, it is allowed to increase the weight of building structures to 4-5 tons, but in this case, a mandatory verification calculation is required using the method of strip foundations.
Description of construction technology
The construction of an insulated Finnish foundation consists of several successive stages:
- determining the construction site, performing design calculations and developing the graphic part;
- pit marking;
- complete removal of the fertile layer;
- development of a trench for a shallow strip foundation;
- installation of a drainage layer of crushed stone;
- laying a waterproofing layer;
- installation of reinforced support cushion MZLF;
- laying a foundation strip from building blocks;
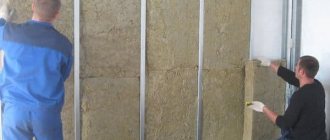
- internal insulation of the strip foundation with polystyrene foam boards;
- backfilling the inside of the pit with fine-grained crushed stone and sand;
- laying floor insulation slabs and reinforcing mesh;
- installation of underfloor heating pipes;
- pouring concrete for the construction of the slab;
- laying blind area insulation around the perimeter of the building.
At the final stage, a blind area is installed and unused soil is removed.
Marking and excavation work
The marking of the future foundation must be carried out in strict accordance with the adopted design decisions. In this case, existing external communications, access roads, boundaries of the building site and other factors should be taken into account. The working axes are marked with a cord stretched along horizontal strips with a margin of 500 mm from the outer perimeter of the building.
After this, the fertile layer must be removed to the depth of germination of the plant root system. Under all load-bearing walls, a trench should be dug to the design depth of the strip foundation with a reserve for the installation of a bulk drainage layer.
Drainage, sub-base layer and installation of foundation strip
A layer of crushed stone 200 mm thick is poured into the trenches for the MZLF device, compacted and covered with a layer of geotextile.
Next, an underlying sand cushion is poured and formwork is installed to fill the tape base plate.
The reinforcement frame is knitted, placed inside the formwork and filled with concrete.
During concrete hardening, work can be carried out to remove or level the soil removed from the pit and trenches. After the concrete mixture has set, building blocks can be laid to the calculated height of the plinth. For large plinth heights, it is recommended to lay reinforcing mesh every 3 rows of blocks.
The outer and inner surfaces of the base should be insulated from moisture. To do this, it is necessary to use lining waterproofing materials for the outer surface, and coating materials for the inner side (more about their types here).
Waterproofing.
Backfilling the underlying layers and laying insulation
Install polystyrene foam boards with a thickness of at least 100 mm vertically along the inner surface of the base and secure them. Lay a geotextile fabric at the bottom of the pit and fill it with crushed stone to create a drainage layer. The backfill must be thoroughly compacted with a vibrating plate.
Lay 3 layers of rolled hydraulic insulation on the crushed stone layer, gluing all the strips and layers together. In this case, it is necessary to provide a supply of waterproofing for wrapping it on the vertical wall of the basement part of the strip foundation.
Lay insulation slabs over the entire area of the pit to create a layer 200 millimeters or more thick.
Reinforcement, pipe installation and concrete pouring
Place ready-made or self-knitted reinforcing mesh with a cell size of no more than 150 mm on the surface of the insulation (more details about reinforcement here).
Mount water heated floor pipes on top of the mesh, tying them to the fittings.
The length of the pipeline in each individual circuit should not exceed 90 meters with a diameter of 14 mm and 120 meters with a diameter of 16 mm. Therefore, when installing pipes, you will end up with several heating circuits depending on the total area of the house.
Reinforcement.
The concrete mixture must be poured in one work shift, without making technological breaks. To do this, it is recommended to use the services of centralized delivery of pre-fabricated concrete. The poured mixture must be well compacted using a submersible vibrator or vibrating screed.
Pouring concrete.
Warm blind area device
The base of the blind area is a layer of crushed stone and sand covered with geotextile. Insulation boards and reinforcing mesh are laid on top of it and a layer of concrete is poured. The width of the blind area is at least one meter. When laying concrete, the slope of the surface should be maintained away from the house.
Insulation of the blind area.
In more detail, the technology for installing an insulated Finnish foundation can be seen step by step in the following video.
Foundation with heated floor. USHP or Tape with floors on the ground?
VKTwitterOK
video content
Rating: 4.5;
Votes: 2 Many of you ask which foundation is cheaper and better: USP or strip foundation with heated floors on the ground? In this video I share my experience with you. I hope this helps you decide on the foundation of your home. Nikita: A high base is always a priority, an area with a slope, snowdrifts, etc. Therefore, a buried strip, possibly with concrete poured piles (optional) and then a slab or slabs.
Once a two-story bathhouse was built in a swamp, according to the client’s drawing, a pit 5 meters deep, rock, sand, then a 500-thick slab and a 500-thick strip on top of it with wooden joists for the floor. As a result, the bathhouse floated along the winter-summer horizon by +-100mm. On the second floor there is billiards for 500t. p, I had to adjust the table level every season. So if the plot is in a swamp, sell immediately and run with only your heels sparkling! Date: 2020-06-20
← Modern 3x3 barbecue gazebo for 40 tr. WE BUILD FOR OURSELVES with our own hands
Garage workshop LSTK do it yourself. We build for ourselves →
Related videos
NOT JUST BORSCH! 4 simple and unusual beetroot dishes that you are unlikely to have tried
• Tsvetok
Why do the tips of begonia leaves wither? How to avoid mistakes when planting and caring for begonias.
• Garden world
Ficuses are fashionable! Transplantation of ficus Benjamin and Elastic
• Garden world
15 DIY STICKERS for boys! How to make stickers WITHOUT GLUE from a cover
• Lum Planets
EVEN ANY MAN WILL COOK! EASY SOUP WITHOUT FRYING CHICKEN WITH VERMICHELLI (NOODS.
• Tatiana gardener
Do you want to grow beautiful petunia seedlings? Repeat after us.
• Garden and Vegetable Garden - Do It Yourself
Comments and reviews: 9
Ilya Great video! Comparison of USHP and Tape with floors on the ground is a good alternative. In fact, you didn’t quite do USP. A real USP must have an active drainage system, because this is the only way that half a meter of sand bedding becomes a non-heaving base. But drainage costs a lot of money. The ideal (in my opinion, would be the third solution of my authorship) is a combination of a pile foundation with a grillage of 300x300mm, while the grillage is not deepened at all. And on top of the grillage a slab is made, but through 100mm EPU gaskets, as on the USHP under the external ribs. In this option you will need only 300mm of backfill into the grillage under the slab, which is much less than the backfill under the USHP. Drainage for a pile foundation below the soil freezing depth is not needed at all. Tamping the backfill in the grillage under the slab is not critical, since after the general slab has set, backfill will not be needed at all. By the way, the backfill of the grillage can be replaced with cheap polystyrene foam for the entire depth of the grillage, so the price can be the same as sand with a tamper. As a result, you also save on the blind area and insulation of the foundation, since insulation of the blind area for deep piles is not necessary, and the base is cold and does not require insulation if there is a 100mm EPPU layer in the gap with the slab. If you heat with electricity, then instead of a water floor you can do electric heating with a regular field wire (vole) with a resistance of 65 Ohm/km. it's about 20m/m. sq. floor with layout through 100mm double conductor. Total 150-200 rub/m. kV of electrical wires on the floor with an output of about 65 W/m. sq. ,
Alexey Konstantin, we need your objective opinion. I got a house with an attic floor and a very unstable foundation - it was already crumbling and full of cracks. The floors are wooden inside, I will install warm floors. So the actual question is - what is the best thing to do, strengthen the foundation from the outside (and it won’t work everywhere) or somehow connect the subfloor with the foundation (for example, drill and insert reinforcement through) and so that the subfloor takes on part of the load from the walls? Our soil is not heaving, but due to the fighting (Donetsk) and vibrations, all the walls are cracked and I am afraid that someday this may make a negative contribution. Leave your opinion, if it’s not too difficult, and those who know what’s the best thing to do, please tell me. Advice such as moving away from there is not taken seriously. Thank you in advance.
Peter Konstantin. Everything you said is not true when comparing a strip foundation and an insulated slab, but is only true for that strip and the one you built, there are different strips, and yours is probably the most expensive and labor-intensive variety. For example, in my project they drew the ribbon differently. 700 width and 300 height, remove black soil, 30 cm of sand and immediately tape. It’s convenient to knit, it’s convenient to cast, the formwork is made of 30-gauge boards, without spacers, it withstood the vibrator without any problems. There is only 30 cm of sand inside, and the same amount outside for the blind area. The insulation of the blind area and floors on the ground is carried out at the same level, so no insulation or finishing of the plinth is necessary. The foundation itself is insulated from above with aerated concrete walls standing on it. In my opinion, this version of the tape is cheaper than yours.
Artem0023 Kostyan, why didn’t you consider the option of FBS blocks for a house? You don’t need a mess with formwork, and you save time and money, installation is quick, you don’t have to bury the space inside with sand, but make a basement room, another floor underground won’t be superfluous, you cover it with slabs, polystyrene foam and heated floor screed, you don’t need cars and sand there is no need to compact anything, I have 10x10 FBS under my house in three rows and floors with slabs with waterproofing and insulation and all the work on excavating equipment and delivering materials came out to 400,000, there are two more tapes filled in 20 cm each, one leveling under the blocks like a pillow with reinforced, and the second tape on top of the blocks is like an armored belt, also with reinforcement, it also acts as a beam for doorways in the basement
kauk86 incorrect comparison, just a set of episodes about two types of foundations different in scale and design, USP has only two disadvantages, but they are very large - a low base and the fact that you need to know in advance down to the millimeter the location of everything and everyone, and for an ordinary person even with a project in the sketch, as I have during construction for 3-4-5 years, there is no final version of the location of plumbing and electrical consumers, well, there is also a third option for the foundation, which in my opinion is the best, Tiese piles + hanging grillage + floors on the ground, this is what I have it’s made for both the house and the porch, and for all outbuildings, in terms of price and other qualities, IMHO it’s superior to the two mentioned
Pavel is now in fashion for USP. but in our conditions for a residential building I would not. either a tape, or a pile grillage, or a plinth. USHP is not waterproofed because it is believed that the concrete lies on the ground and on the eps. but like in that joke about the paratrooper and the crowbar. this does not guarantee complete tightness of the hole) also, what’s the point of making a seal on a slope? again, we have a lot of moles, shrews, and mice. which can be easily dug even under an 80cm deep tape. and under USP it is very dangerous. heavy rain + undermining and ushp is already hanging in the air. and if your cool dog wants to bury a bone there) in general, for a garage, for a house, I wouldn’t do it for myself.
Vladimir Greetings, Konstantin. Glad to see you. I did everything almost correctly. There is, of course, unnecessary stuff, but what can I say now, since I’ve already done everything. I'll tell you about the heated floor in the garage. Not everyone is willing to pay for the extra waste of electricity for heating. Here the house consumes electricity, and also the garage. It’s okay if the workshop is in the garage, it will generate income. A simple furnace for testing is enough for me. (well, I’ll install a couple of radiators and a small electric boiler to maintain heat in the cold. Good luck to you.
Vlad Konstantin, well, of course you compared two objects with different amounts of material. The tape can be made in Eps formwork with a height of 25-30cm. Floors on the ground can be made as in USHP without waterproofing, too (depending on the geology, of course. The problem with USHP is large heat losses and the presence of a heated floor in the supporting structure. That is, if overheated, there may be expansion of the concrete and cracks in the wall. Also in the case of repairs to communications it is necessary to break the supporting structure, and not just a screed on the ground
Alexey I read that for ushp, EPS is placed under load-bearing walls. In other places, the use of polystyrene foam is mandatory. The fact is that the load-bearing capacity of EPS is higher than polystyrene foam, and the pressure of load-bearing walls on the ground is also higher. Therefore, the floor bends outward, which will require additional reinforcement. Foam plastic, due to the fact that it is more easily deformed, does not require such reinforcement.
Construction technology
Installation of the foundation in the form of an insulated Finnish slab is carried out in several successive stages:
- choosing a construction site and marking the contours of the building with a margin of 500-700 mm on the outside;
- removal and storage of fertile soil layer;
- development of a pit for the foundation, trenches for the drainage system and external utilities;
- connection to external engineering networks;
- backfilling and compaction of sand and crushed stone cushion;
- laying and fixing a layer of hydraulic insulation;
- installation of formwork and installation of reinforcement cages;
- installation of pipes or heating cable for heated floors;
- pouring concrete mixture.
The last type of work and reinforcement can be carried out in two stages. First, the strip part is concreted, and then, at a convenient time, a warm slab is installed.
UVF scheme.
Marking the pit and trenches
Marking the contours of the pit is similar to marking a conventional shallow foundation, but here only the outer contour is marked using a cord and pegs. You should mark the exact line of the outer wall of the concrete tape, step back 500-700 mm from it and pull another cord. This will be the edge of the pit, but not the foundation.
Depending on the total weight of the building, the width of the strip foundation can be from 600 to 800 mm. A support heel with a width of 800-1000 mm is arranged in the lower part. The width of the insulated blind area over the poured non-metallic materials must be at least 700 mm. The depth of laying the strip part of the foundation is at least 600 mm from the lowest point of the soil surface.
Laying drainage and underlying layers
Drainage pipes should be laid along the entire perimeter of the tape. To do this, along the edges of the pit, you need to dig a recess 500 mm below the supporting heel and take the pipes outside the building area. Laying drainage pipes should provide for a slope of 4-5 degrees.
The first layer of sand should be backfilled onto geotextiles laid on the ground. This will stop the flow of moisture and prevent the germination of weeds.
The sand is carefully compacted and spilled with water. After this, fine-grained crushed stone is poured onto it. The thickness of both layers is 80-120 mm.
Waterproofing device
Two layers of rolled hydraulic insulation are laid on top of the crushed stone, with the overlapped joints coated with bitumen mastic and the edges raised above ground level. Adjacent strips of material should overlap each other by 100 mm. The position of the strips in different layers is perpendicular, which will completely eliminate the overlap of the seams.
Protection of the outer surface of the strip part of the foundation is done after pouring and hardening of the concrete mixture. For this purpose, roll insulating materials impregnated with bitumen are used. Before gluing the surface, it is primed with a primer in 2-3 layers. The strips are glued onto hot bitumen with simultaneous heating of the wall and waterproofing.
Concreting tape
This stage of work begins with the assembly of the reinforcing frame. Its design consists of two pairs of longitudinal strings with a diameter of 8 mm, located one above the other. The distance from the reinforcement to the edge of the concrete layer on all sides must be at least 50 mm.
To fix the longitudinal rods, it is convenient to use prepared square or rectangular frames with a diameter of 6 mm. The connection of individual elements is carried out using knitting wire or self-tightening polymer clamps.
Next, you need to install formwork from boards or durable sheet material.
A good solution may be to use EPS sheets that are not removable afterwards. Thus, the outer wall of the foundation will be insulated and there will be no need to look for material for a removable formwork structure. A reinforcing frame is installed inside the formwork, after which the concrete mixture can be poured.
Laying insulation, reinforcing and pouring the slab
Expanded polystyrene boards should be laid in 2 or 3 layers, depending on the accepted thickness of thermal insulation. The arrangement of the slabs must be done in such a way as to exclude the coincidence of joints in different layers. The inner wall of the tape is also sewn up with a layer of 30-50 mm thick EPS to the bottom point of the structure.
The small thickness of the slab and the absence of large load-bearing loads make it possible to use a reinforcement cage in the form of a metal mesh with a cell size of no more than 150 x 150 mm. You can assemble it yourself from a rod with a diameter of 6 mm or buy factory-made welded blanks (read more about reinforcement in this article). To raise the reinforcement above the level of the underlying cushion, it is convenient to use special plastic supports or clamps.
Extruded polystyrene foam is not afraid of moisture and retains its characteristics even when immersed in water.
Pouring concrete
Before laying the concrete mixture directly onto the reinforcing mesh, you need to secure the underfloor heating pipes or heating electric cable. They can be tied using wire or plastic clamps. After this, start pouring concrete.
The concrete mixture is laid from one of the corners in a strip of 0.8-1.0 meters, moving along the wall. After completely laying one strip, compact the solution using a vibrator and level the surface. Then fill the second strip in the same way and so on until the end of the site.
Blind area device
The full efficiency of the Finnish slab foundation design will be achieved only if there is an insulated blind area around the perimeter of the building (read about it here and here). It requires the presence of:
- a support cushion made of sand and gravel covered with geotextiles;
- roll waterproofing;
- layer of thermal insulation made of polystyrene foam; v
- cement or concrete screed.
A properly executed blind area will provide additional thermal protection for the foundation part of the building, eliminate the erosion of structures by water and increase the service life of building structures.
Preparing the soil for a concrete foundation
Before you start creating a concrete base for a heated floor, you need to take care of the proper preparation of the land.
It is extremely important to determine the depth of groundwater, which will eliminate the risk of flooding of the created foundation. It is best to take care of organizing a drainage system that will drain water.
Having solved the problem with groundwater, it will be possible to begin work on creating a concrete foundation. As already noted, it is best to use river sand. Crushed stone should be used in a coarse fraction. The depth of the layer should be up to 30 centimeters.
If the soil under the house is dry, then a bedding layer is laid on top. You can use geotextiles, which will help prevent moisture penetration above this layer. Gravel or coarse crushed stone is poured on top of the bedding layer.
After filling the layer, it should be well compacted. For this, ordinary water is used in large quantities. It is prohibited to replace sand with peat or black soil, because they are washed out very well.
It is important to consider the following points regarding preparatory work before creating a concrete base:
- Litter layer. By making such a layer 4-5 centimeters thick, it can be turned into a load-bearing layer. To do this, a layer of crushed stone is filled with a cement-sand composition. It is recommended to use concrete grade B10. To prevent the mixture from spreading, slats are used. The mixture must be regularly moistened until it dries completely;
- Waterproofing layer. A waterproofing layer is traditionally applied at the lower level of the concrete base. To do this, thick polyethylene is used, which is laid overlapping each other. This material is used for the reason that it is of high quality and cheap. As an alternative, you can use polymer-bitumen membranes, which are made of polyester. When laying such plastics or polyethylene, it is important to make a spacing on the walls of up to 20 centimeters;
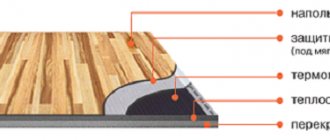
- Thermal insulation layer. To protect the future concrete base from freezing and heat loss, care must be taken to organize a thermal insulation layer. As practice shows, a high-quality thermal insulation layer can block heat leakage from the room by up to 20%. A reliable thermal insulation layer must have a number of features. The first is to have low thermal conductivity. Secondly, they have good strength. Third, maintain its characteristics even at high humidity or low temperatures. The best thermal insulation layer today is thermal insulation substrates made of polystyrene foam.
We recommend: How to lay polystyrene foam for heated floors?
Field of application of UVF
Studying the technical characteristics of an insulated foundation made of Finnish slabs, we can confidently say that such a structure can be used in areas with different climatic conditions, is suitable for any soil composition, and can withstand loads of up to three tons per linear meter of strip foundation.
Each of the given characteristics corresponds to the majority of frame-type structures under construction, the height of which reaches two floors.
By increasing the supporting base of the foundation strip, it is possible to add the mass of the building structure at the rate of four to five tons. But in this case, it is necessary to perform a mandatory verification calculation using the strip foundation method.
In what sequence is the Swedish stove installed?
Compliance with the construction algorithm of the Swedish slab affects the strength properties of the base and energy-saving characteristics. The general scope of work includes:
The soil under the insulated slab does not freeze, which minimizes the risk of frost heaving problems in foundation soils
- Construction of the pit.
- Installation of drainage pipes.
- Laying communications.
- Laying insulation.
- Reinforcement.
- Warm floor assembly.
- Concreting.
Let's consider the main features of the stages.
Marking the area
This stage of work involves transferring the foundation project to local conditions. Before marking begins, it is important to carry out geodetic surveys aimed at determining the nature of the soil and the depth of the aquifers.
During the marking process, the following are determined:
- foundation contours;
- ways to connect utilities.
After marking, it is important to protect the site from precipitation by installing a storm drain.
We carry out excavation work
Earthworks include the following work:
To ensure normal operation of the insulated Swedish slab (USP) and prevent frost heaving, it is necessary to provide a groundwater drainage system
- Clearing the construction site of construction debris and vegetation.
- Extraction of fertile soil layer to a depth of 0.4-0.5 m.
- Formation of a compacted sand cushion with a layer thickness of 30 cm.
- Extraction of soil around the perimeter of the pit for drainage lines.
- Filling clay at the bottom of the pits, moistening and compacting the clay layer.
After completing the excavation work, proceed to the next stage.
Setting up a drainage system
Sequencing:
- Lay down geotextiles.
- Pour in crushed stone.
- Compact the crushed stone.
- Lay drainage pipes.
- Fill in a layer of crushed stone.
After laying all layers, cover the bedding with geotextile fabric.
We lay utility lines
When performing work, observe the following sequence:
All necessary communications must be laid under the slab in advance.
- Install communications.
- Add a layer of sand.
- Compact the sand bedding.
After installation, it is important to check the correct connection of utility networks.
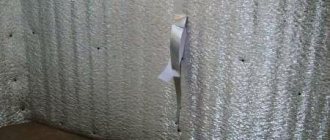
We select insulation and install it
When choosing a heat insulator, give preference to insulation with reduced thermal conductivity.
It is advisable to use extruded polystyrene foam, which has the following advantages:
- resistance to the development of microorganisms;
- environmental cleanliness;
- resistance to moisture.
Lay polystyrene foam in two layers with overlapping sheets of 40-50 cm. Use special fasteners for fixation.
We lay the reinforcing mesh and install the heated floor
When performing reinforcement, pay attention to the following points:
- use tying wire to connect the reinforcement;
- lay the reinforcing mesh in two tiers;
- ensure a distance to the heat insulator of 30-40 mm.
Install heating lines taking into account the layout. Use plastic supports for laying pipes.
Higher thermal power of underfloor heating is achieved by denser pipe laying
Recommendations for laying underfloor heating lines
When laying heating lines, pay attention to the following points:
- ensuring a distance of 100 mm between heating lines;
- making a distance from external walls of 150-200 mm;
- correct pipe laying according to the developed diagram.
After laying the lines, check the tightness of the system with compressed air.
We install the formwork
Installation of a Swedish slab requires the construction of formwork around the perimeter of the foundation. For formwork, plywood or board panels reinforced with supports are used. The inner surface of the formwork structure is lined with polystyrene sheets. They provide thermal insulation of the foundation from the end part.
We pour the concrete mass
When concreting, observe the following requirements:
- pour concrete in a 10-centimeter layer;
- fill at intervals of no more than an hour;
- use a vibrator or slab to compact the concrete.
Moisten the surface of the concrete during the hardening process, cover the base with polyethylene to protect it from moisture evaporation.
Warm floor with concrete screed
Using concrete you can make a very strong and reliable foundation. It will be very easy to lay a warm floor on it. The concrete base for underfloor heating does not affect the floor foundation and external walls. It is a separate element.
To prepare a high-quality concrete base, it is advisable to use concrete of a grade not lower than M150. If a concrete base for a heated floor is created in a large industrial room, it is better to use concrete grade M 300 and higher.
Before starting work, you need to take care of purchasing all the necessary components for the future concrete foundation. It is best to use river sand, which contains a minimum amount of various impurities, due to which the created concrete base will be particularly durable. You will also need crushed stone.
We recommend: How to install Devi heated floors?
A concrete base for heated floors is a classic version of such a heating system. There are relatively many advantages of concrete (wet) screed. By forming a concrete base, the following is simultaneously created:
- High-quality thermal insulation layer that will eliminate large heat losses;
- Maximum smooth surface, demonstrating good resistance to mechanical stress;
- System for uniform distribution of heat energy.
Final Recommendations
The Swedish slab foundation ensures the stability of buildings and has increased energy-saving properties. Waterproofing under the foundation slab will ensure reliable protection of the base from moisture. According to the Swedish method, a monolithic slab with a grillage can also be poured. To build a house on an insulated base, aerated concrete blocks and slabs are suitable. When building a house, to reduce heat loss, you should pay attention to the layout of the floor slabs. An important point is sealing the seams on the ceiling between the slabs.
Sources
- https://eplan.house/articles/uteplennaya-shvedskaya-plita-ili-lentochny-fundament
- https://www.ytong.ru/ushp-ekonomiya-sredstv.php
- https://uteplenieplus.ru/kak-uteplit/fundament/uff-uteplennyj-finskij-fundament/
- https://fin.house/fundament-doma/
- https://FundamentClub.ru/lentochnyj/tehnologiya-fundamenta-finskaya-plita.html
- https://DomZastroika.ru/foundation/tehnologiya-stroitelstva-fundamenta-finskaya-plita.html
- https://betonov.com/fundament/plitnyj/uteplennyj-finskij-fundament.html
- https://pobetony.expert/bloki-i-perekrytiya/uteplennaya-shvedskaya-plita
[collapse]