Give me advice on garage door trim materials!
Good day everyone! The question arose about insulation and the inner lining of garage doors! I went through a lot of options! I want something cheap and civilized because the funds are scarce (lining, plastic panels are expensive), and the hands are out of place. I was thinking about using fiberboard, but I’m afraid that it will swell with time and humidity and it will be in vain! Maybe it’s worth soaking it with something? Suggest options! Thanks in advance!
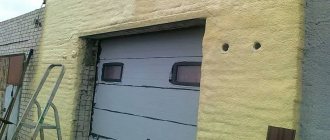
For one standard gate 2*3 you will need: ..1.C8 simple galvanized sheet metal - 3 sheets of 2 m each/price 155 RUR/sq m/ ..2.Galc corner 40*40*1.2 - 4 sticks of 3 meters each /from the facade system ..3.Polyfoam 3 sheets 1*2 50 mm ..4.balloon of professional foam ..5.Seeds with a drill - a handful. Procedure: Glue the foam onto the foam along the entire inner surface of the gate. Most likely, the frame is from the 50th corner. Great. Then we measure the profiled sheet and attach it to the foam on the same foam. It will stick. Then we cut the corners to size and insert them between the corner of the frame gate and polystyrene foam. Covering the cut edge of the corrugated sheet with this. We fasten everything with self-tapping screws.
I have foam inside, and it’s sewn with plywood, and it’s painted. It’s been 7 years now, and it’s great! It doesn’t lead, it doesn’t twist, it doesn’t get wet. There’s no cheaper option.
arnega It is better to prime the plywood well with GF-021 primer and paint on top with another layer or two of PF-115 enamels. Then it certainly won't get wet. Personally, all my garages are lined with clapboards, except for one - there I’ll use plywood, as mentioned above.
I sheathed the foam with regular, non-profiled galvanization - very kosher.
- We fasten bars 40 along the perimeter of the gate leaf (flush with the corner, including on the middle horizontal crossbar, if there is one). To do this, we drill around the perimeter of the gate leaf corner every 30-40 cm and fasten these bars with wood screws. We have a frame!
- We try it on and cut the plywood to size 10 - the larger the sheets, the better!
- We insert glass wool or any 40-50 insulation and on top of it we screw the plywood with self-tapping screws to the frame made of bars. That's it, the gate plane is closed with 40-50 mm of insulation and 10 mm of plywood
- Further. I've had varnish on stain fine for 3 years, nothing has swollen, although in winter drops of water often flow down the plywood from the inside, it's very smooth, beautiful, and warm. You can paint it - there are many options.
- Before this, it is advisable to paint at least the inside of the gate, then it will not be possible without complete disassembly. Carefully foam the cracks in the gate rail. Lapotaaaaa.
Vladimir_Vas wrote: I sheathed the foam with ordinary, non-profiled galvanization - very kosher.
and it’s terribly uncomfortable, like in a Soviet workshop; plywood is many times better. and if it’s dark Pinotex and under a glossy varnish like mine, it looks great and is durable!
No matter how many different things I have seen, there are certain disadvantages in some things. What do you need from insulation? What would be warmer. What's happening? If it’s warm in the garage, then when it’s cold, the metal condenses moisture, and it needs to be reliably cut off. We glue self-adhesive isolon onto the painted gates. why her? Yes, because any glue, and especially foam, will leave unadhesive areas. where condensation will form. Next, we screw the slats over the isolon, again, so that there is no contact with the metal and the slats do not rot. We glue the polystyrene foam onto the isolon using adhesive for strip tiles. Here the air is no longer particularly important. We sew panels or lining, or something else onto the slats.
There was never any leakage or dripping from the gate, there was no frost anywhere, I often heat the garage up to +16. It has never been below -3 in the garage either.
If the garage is unheated, then there is absolutely no point in insulating it. This will not add heat.
***** I’d rather decorate everything with a trailer and in the last garage it’s more comfortable, you know, and there’s no condensation **** and it’s not cold to lean against a piece of wood, you know. All my garages are finished from the inside with clapboards - both the walls and the ceiling, and 40 pieces of polystyrene foam underneath everywhere, of course. In addition, all this is impregnated with fire and bioprotection. So not everything can definitely be measured only in banknotes.
chico63 wrote: I’d rather decorate everything with a trailer and in the last garage - it’s more comfortable, you know, and there’s no condensation ***** and it’s not cold to lean against a piece of wood, you know.
We have already mentioned above how condensation flows from inside such a door. And when covering an iron door with iron over insulation, there will be no condensation inside the door, because 0.5 mm of iron has an absolute vapor barrier. With an iron sandwich, condensation occurs only on the outer surfaces. At the same time, the gates and garage are much drier than with wooden cladding. And one more thing about fire retardants - their service life is a couple of years. And with regular wetness from condensation - less than a year. And after that the wood burns beautifully. What is the supply of firewood in the garage? We regularly see in the program of emergency on NTV.
Your reasoning is quite understandable and logical, only, for example, many years of personal experience (about 20 years from the first garage and 14 years from the last one) shows that if everything is done carefully, then there is no special condensation in the sash and in the garage, even if The ventilation system is well made. My gate leaves are pre-primed from the inside and painted with several layers of GF and PF. Then a lathing made of 40 pieces of lumber with impregnation is tightly inserted and tightened with screws from the end of the sash. Then sheets of 40 mm foam plastic are inserted into it very tightly, without any gaps. If you want, you can cover it with glassine paper. On the outside, everything is carefully sewn up with cheap clapboard or primed and painted plywood. A strip of thin rubber is also attached along the perimeter of the sash - it covers all the cracks. Nothing leaks anywhere. Moreover, there are two ventilation holes in opposite corners of the garage, and one of them goes into a high, 6-8 meters, ventilation pipe. But as for the fire hazard - a stock of flammable liquids is much more dangerous in a garage, and even more DANGEROUS are full or poisonous gas cylinders and poor electrical wiring (including in the car itself) and electrical appliances. Well, of course, headless welding work. For example, I do all my welding exclusively on the street next to the garage. I also have provisions for installing a large collapsible canopy measuring 2.5 x 3.5 meters - so there’s no drips on top either. Of course, the ideal garage option from the point of view of firefighters is a thick-walled concrete box with walls and floors completely lined with 5 mm steel sheet. But, for example, my car is always parked on the street, and in the garage it’s just a workshop.
Why sheathe garage doors?
As a rule, a garage built independently or purchased already has thermally insulated walls and a roof. At the same time, gates are the main source of heat loss. Therefore, insulating garage doors should be done without delay. Covering the doors will save on heating costs in winter and keep you cool on hot summer days.
Garage doors come in different types. One of the most common ones is made of a material having a three-layer structure (sandwich panels). This gate option is quite frost-resistant and moisture-proof; it will be quite warm in the garage. Meanwhile, metal gates cause the formation of ice during the cold season and require insulation.
Sandwich construction
During frosts, this type of shutter transfers cold air from outside into a room with a positive temperature.
Such processes lead to freezing of garage doors and loss of heat inside the garage.
Hinged door design
The resulting ice is fraught with the following negative consequences:
- rapid occurrence of rust on the doors;
- condensation settling on the metal body of the car. As a result, the car body becomes susceptible to premature corrosion;
- a large accumulation of layered ice mass that prevents the gate from opening.
Frame assembly procedure
Timely prevention of the problem will eliminate the mentioned consequences in the future. Therefore, it is better not to put off insulating the gate and quickly select a suitable material for covering.
Sectional Representative Scheme
Among the existing types of gates (swing, overhead, sectional), only swing gates are insulated. Other types of sashes are insulated during production with polyurethane foam panels 4.5 mm thick.
The modern market offers thermal insulation materials of several variations, which have many advantages, with a high coefficient of resistance to heat transfer and increased fire resistance.
Insulation with mineral wool
How to effectively insulate garage doors?
It’s not enough just to be the owner of a garage; it’s also important to be able to properly arrange the space - to rationally use the space and ensure comfort.
The central and defining element in the garage is the gate - the largest element of the building by area, through which the main heat transfer to the outside occurs - with them we will begin the work on thermal insulation.
Why is this necessary?
It is a truism that the issue gains relevance as winter approaches, because the time has come to create conditions for the safety of the “iron horse”, equipment, tools, country supplies and preparations.
Even an anti-corrosion coating will not protect the car from dampness and cold, and the consequences will be very disastrous.
As bonuses - deterioration of the interior decoration of the garage, rotting electrical wiring, which risks causing a fire, mold, unpleasant odor, and the bleak prospect of getting sick.
Some nuances
There are some features depending on the types of gate construction. For example, it makes sense to insulate swing gates. Their frame consists of profile pipes, and externally they are sheathed in steel sheet. Since this material has high thermal conductivity, such gates are not very effective for heat conservation.
Sectional and overhead doors do not require additional thermal insulation. The body in such models also consists of sheets of steel, thoughtfully insulated inside with polyurethane.
It will be extremely useful to have a wicket in the gate, which will reduce heat loss during frequent use.
But you won’t be able to insulate roller shutter gates even if you want to. Their design involves winding the fabric onto a drum - even with the thinnest insulation, the system can fail.
Choosing an insulating material
The main thing in the work on thermal insulation of gates is the insulation material. It is necessary to pay attention to the quality and properties of the insulation. Here we will have to remember physics - the body’s ability to conduct heat, that is, thermal conductivity. The given value is characterized by the coefficient of thermal conductivity.
The lower the coefficient, the greater the likelihood that the material will suit you.
Let's move on to the list of the most common options and their disadvantages:
- Mineral wool (glass wool, stone wool) is fireproof, but not moisture resistant. Once you get it wet, you can forget about its thermal insulation qualities.
- Polystyrene foam is lightweight, durable, has low thermal conductivity, but is not fire resistant enough. Ideal for insulating gates with your own hands.
- Expanded polystyrene (PSB, PSB-S) is a type of foam plastic, one of the few materials that are fire-resistant and self-extinguishing, because impregnated with fire retardant.
- Extruded polystyrene foam (EPS) is fire-resistant, durable, with very low hygroscopicity.
- Polyurethane foam (foam rubber, rigid polyurethane foam) is an insulation material that gradually expands in volume. It is applied by spraying using special equipment. Polyurethane foam has high thermal insulation properties, good adhesion, and excellent sound and waterproofing properties.
- Penoizol (urea-formaldehyde foam) is a liquid foam that turns into foam when applied. Does not burn or smolder. It is resistant to moisture, which provides high thermal insulation and is not susceptible to attacks by microorganisms and rodents.
Please note that the choice of insulation also depends on the size and material of the gate surface.
Basic methods
The procedure for working with a specific insulation is individual. However, in most cases (except for the use of special equipment), insulation can be done independently.
Main thermal insulation options:
- Gate frame and gates. They start by inspecting the frame and leaves of the garage door. Rust is cleaned off with an iron brush. Then it is necessary to cover or weld all the cracks and cracks, which will eliminate heat loss and drafts. It is recommended to prime the surface of the gate and treat it with an anti-corrosion or antiseptic agent. Special polymer inserts can be fixed to the floor.
- For one or more targets. Most often, foam boards are used for such insulation. The material of the second sash should be the same as for the first - with the same characteristics and thickness.
The insulation must be installed close to the gate, leaving absolutely no air gap to prevent condensation from accumulating.
Polystyrene foam is laid in two ways:
- On a metal structure thanks to special glue.
- Between the sheathing using a frame. You can build a sheathing using metal profiles, slats, or timber.
Gates and wickets are usually sheathed with corrugated sheets or lumber: OSB, MDF, wooden lining, plywood. The optimal solutions are OSB and lining - strong, durable materials that are not afraid of rotting.
Wooden lining must be treated with fire retardants and antiseptics.
Work order
Insulating garage doors includes the following steps:
- Removing stains and dirt. Detection of defects and damage on the door leaf. Removing rust and filling cracks. Produced with a brush or sander.
- Padding. Application of anti-corrosion agents.
- Installation of sheathing. For the frame, wooden beams or metal profiles are traditionally used. Mounted on dowels. The sheathing is fixed to the canvas frame - on a profile pipe or in a corner.
- Placing insulation between the slats. Foam boards are attached with glue. The joints are carefully sealed with sealant or foam.
- Gate trim.
- Completion. The casing is opened with varnish, the metal material is painted.
How to cover the outside of a garage door
It is advisable to finish the sashes from the inside and outside. In the first case, we lay insulation. Exterior finishing involves improving the appearance of garage doors and additional insulation.
The external surface is finished using the following materials:
- wood-laminated boards (plywood);
- profiled metal sheets (corrugated sheets);
- thin cladding boards (lining);
- facing panels (siding).
When choosing thermal insulation products, they take into account condensate indicators and dew point temperature (the temperature of the air at which the steam it contains condenses into dew).
External finishing material of sufficient thickness will not allow the dew point to pass through it when the sub-zero temperature outside is constantly decreasing. Thus, condensation will not accumulate on the surface of metal gates, including stainless steel ones.
Use of edged wood
Now we will look in detail at the process of installing each finishing material individually.
Finishing the sashes with plywood
Wood-laminated board is the most inexpensive and easiest to install finishing material. The cladding process consists of 4 stages:
- Using a hacksaw or jigsaw, cut plywood sheets to fit the gate. To avoid the doors not closing tightly, the markings are made with an indentation of 50 mm.
- Plywood boards and sashes are measured.
- Using a drill with drills for metal and wood, through holes are drilled in the desired areas of the surface.
- The sheets are fastened with bolts and nuts to the outer surface of the sashes using wrenches.
It is recommended to fix plywood with galvanized fasteners, which are matched to the color of the material.
Upon completion of installation, the finished surface is covered with protectors or paint. This is necessary to increase moisture resistance.
Use of grade 2 material
The process of covering the sashes with clapboard
External cladding with clapboard will give the gate an attractive appearance, but will require large financial and labor costs.
Finishing is done using:
- drills with drill bits for metal and wood;
- nuts, bolts and wrenches;
- electric jigsaw;
- small diameter nails and a hammer.
Lining in finishing
To cover the outer surfaces of the gate, follow the step-by-step instructions:
- we cut the block into pieces of the required length (3-4 pieces for each sash);
- We mark the sashes and guides, then drill them through;
- We lean the lumber against the outer surface of the doors so that the holes match. Having inserted the bolts into them, from the opposite edge we connect the fasteners with nuts and screw the bars to the surface of the gate with keys;
- we cut the lining, then using a hammer we nail the finishing material to the guide bars with thin nails.
Product layout diagram
Having completed the plating process, we coat the surface with colorless varnish.
In order not to hide the natural grain of the wood, it is not recommended to use paint.
Finishing gates with siding
Siding is considered the most expensive cladding option. The high cost of the material is due to a number of significant advantages:
- Durability and resistance to precipitation and unstable thermodynamics. Gates finished with siding panels look beautiful for many years.
- There is no need for finishing treatment. Siding does not need to be painted or protective compounds applied.
- Easy to care for. Lining with plywood requires annual treatment. Siding panels will only need periodic washing.
Example of completed work
The technology for covering doors with this material is identical to finishing with clapboard, including the process of additional insulation.
Technology of gate cladding with corrugated sheets
Covering gates with corrugated sheets is an option for internal insulation that is very popular, judging by the numerous positive reviews left by users on thematic forums on the Internet. Old metal gates are perfectly finished with profiled sheets.
Swing gates with corrugated sheet cladding
Installation is carried out using:
- manual or automatic drill;
- Bulgarians;
- screwdriver;
- self-tapping screws.
Scheme of swing gates with corrugated sheet cladding
Sheathing is carried out as follows:
- First, measurements are taken.
- Cut off the sheets of the required parameters.
- Mark the profiled sheet and sashes.
- Drill holes with a diameter smaller than that of the mounting screws.
- The sheets are screwed with a screwdriver and self-tapping screws to the surface of the garage doors.
The material is fastened to the installed frame
The use of painted corrugated board does not require additional finishing.
The photo shows a gate finished with corrugated sheeting.
Garage design
Common mistakes
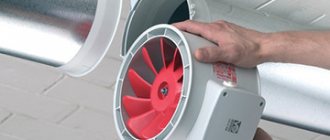
- Ventilation. Having a good ventilation system is necessary in any room, and the garage is no exception. Alas, not everyone realizes this. Many people think like this: ventilation holes are an extra source of heat leaving the garage. In essence, this is true. However, their presence is necessary to avoid excess dampness in this room.
- Metal gate design. Many owners of a car home (which, in essence, is a garage), when setting up a garage, install gate leaves of a solid structure, without a gate. Meanwhile, the gate will allow you to achieve less heat loss during the cold season. Whether it’s the case, when we want to get into the garage in winter, we open a small gate for a few seconds, or we have to open a large gate to do this. The difference, as you can see, is obvious. True, these doors will also have to be insulated. Their insulation is carried out similarly to the insulation of the door leaf.
- Insulation. When deciding how to insulate a garage door, many owners, in an effort to save on insulation, use porous insulation. An example of such an insulating material is mineral wool. The reason why such materials should not be used is the following: most often garage doors are an iron frame with the same door leaf. Moreover, the thickness of the latter does not exceed a few millimeters. Because of this, during the cold season, condensation may form on the inner surface of the canvas due to temperature differences. Porous insulation absorbs this condensate quite well, as a result of which they lose their main qualities.
How to line a garage door from the inside
With internal insulation, low temperatures will affect the load-bearing part, but the dew point will not pass through the inner layer of insulation and will not affect the formation of condensation. Before sealing the garage door with insulating material indoors, take into account the location of the electrical wiring.
Most often, gates are insulated with the following thermal insulation materials:
- polystyrene foam;
- extruded polystyrene foam;
- penoizol.
Laying in prepared sheathing
Their thickness, depending on the region of use, should be at least 20 mm.
Next, we will consider each type of insulation in more detail.
Scheme of the main nuances of the assembly
The bulk of the foam is occupied by gas, which causes toxic smoke during combustion. The material has a high resistance to heat transfer. It is incompatible with most paint and varnish products. Given the high flammability, polystyrene foam is placed between fire-resistant materials. Also, to reduce fire, fire retardant components of organic origin are added to it.
Fixing the material onto polyurethane foam
Extruded polystyrene foam
Refers to foamed types of insulation. It is a product of polystyrene and its derivatives. Extruded polystyrene foam consists of fine-cell granules. Its mechanical properties are determined by different densities. The denser the material, the lower its moisture permeability and higher strength.
This type of insulation is flammable, so when finishing it is placed between fire-resistant fittings. However, the flammability indicator in its labeling may vary. This material is widely used in thermal insulation of walls and internal barrier structures.
Urea-formaldehyde foam (penoizol)
It is similar to ordinary polystyrene foam in color and fine-cell structure. Transportation is carried out in liquid form. It is applied to the surface to be treated under pressure.
When in contact with oxygen, the product swells, filling the free space. When interacting with open fire, it deforms, but does not melt. Does not emit smoke or toxic gases.
Layout of materials
Having discussed the main properties of thermal insulation products, we move on to detailed instructions for the internal cladding process.
Photo of garage walls insulated with foam insulation.
Treatment of internal walls with foam insulation
Insulating a garage from the inside with construction foam
Another method of insulating garage doors with your own hands is polyurethane foam. Of the ways you can insulate garage doors with your own hands, this is the easiest way.
- Polyurethane foam in cylinders (consumption of 5 cylinders per 7m2).
- Spray the foam in an even layer (cut off excess material after drying with a sharp knife)
- Decorative finishing (the covering can be chipboard, lining or any other material).
The advantages of insulating garage doors with your own hands using foam are that the material penetrates even into small cracks. This will also strengthen the entire gate structure.
The safety of your premises and vehicle in proper condition depends on the quality of garage door insulation. Safety also depends on choosing a reliable garage lock.
Are you thinking about how to cover a garage door or what material to choose to fill the frame of an outdoor sliding model? You have come to the right page. In this article we will talk about popular options for finishing structures to insulate and increase attractiveness.
How to insulate gates from the inside
To properly sheathe garage doors, you will need skills in finishing with the selected class of thermal insulation products. The technology of the finishing process is based on several basic rules.
- Installation of thermal insulation is carried out on a clean and dry surface, otherwise the material will not adhere well.
- The cleaned surface is treated with anti-corrosion agents. Mortise and built-in locks are repeatedly tested for functionality (defective ones are lubricated or replaced).
- Upon completion of the preparatory work, the thermal insulation is fixed.
- After sheathing with insulation, the sashes are finished with high-strength material that protects from mechanical damage.
- Insulation materials such as polystyrene foam, polystyrene foam and penoizol are used as the middle layer.
- In order to increase the fire resistance of the insulation, garage doors are covered with non-flammable material or a foil insulating layer.
Internal thermal insulation using polyurethane foam
Foam sheathing process
Sheathing with foam plastic is carried out in several stages:
- Preparation stage. Rust and old finishing coating are carefully removed from the internal planes of the sashes. Bitumen mastic is applied as waterproofing or the surface is painted over.
- The stage of creating the sheathing. A sheathing is created from wooden blocks cut to the width of the sash and matched to the thickness of the foam insulation. The slats are fixed to the sashes with nuts and bolts. The bolt heads should be located on the outside of the doors.
- Finishing stage. After cutting the foam panels to the required sizes, the insulation is fixed to the sheathing using polyurethane foam sealant (spray foam). Also, foam plastic can be attached to the sheathing with other adhesive thermal insulation products.
Installation process and seam taping
After completing the cladding process, to give garage doors visual appeal, it is recommended to trim them with plywood, OSB sheets or plastic panels.
Photo of garage doors insulated with foam plastic.
Sheathing with foam plastic boards
Extruded polystyrene foam finishing process
This material will be more expensive compared to polystyrene foam. However, its high price is justified by three advantages:
- An effective solution to the problem of thermal insulation inside a garage due to reduced heat transfer.
- There is no need to create sheathing (the material is strong and rigid, so it is attached directly to the surface of the sashes).
- A material with a one-sided foil coating that does not require the application of an additional waterproofing layer.
Foil material retains heat in the room
Expanded polystyrene panels are attached with mounting adhesive. It is advisable to use high quality adhesive products, preferably from imported manufacturers. The insulation is best fixed with German liquid nails. The joints are sealed using polyurethane foam.
Pre-installation of stiffeners
The insulation is decorated with plywood, plastic or thin cladding boards. Wallpaper is also used for finishing, but then the surfaces will need to be puttied.
Garage doors of any type, except roller and sectional ones, are best sealed with insulation. You can do the work yourself. When choosing a thermal insulation material, attention is paid to its weight.
Trimming that is too heavy will strain the hinges or power mechanism of automated doors.
Application of fiber material
To protect your car from corrosion and extend its service life, the climate in the garage should be conducive to the rapid cooling of the car and to prevent the formation of condensation.
How to cover the outside of a garage door
To sheathe the outside of the garage door, buy plywood, lining, siding or corrugated sheets. These materials are ideally suited for decorative and protective finishing.
Covering garage doors with plywood
Plywood is the most budget-friendly finishing material. The work will not take much time.
For sheathing you will need the following tools and materials:
- plywood sheets of selected thickness;
- drill with drills for metal and wood;
- nuts, washers and bolts;
- electric jigsaw or hacksaw;
- two wrenches of the required size.
Finishing takes place in 4 stages:
- Cut sheets of plywood to fit the dimensions of the sashes. When marking, keep in mind that you need to retreat 0.5 cm on each side. Allowances are necessary to ensure that the gate closes easily and tightly.
- Mark the sheets and sashes.
- Drill through holes in the required locations.
- Secure the sheets to the sashes using keys, bolts and nuts.
Note! For fixing, galvanized fasteners matched to the color of the plywood are best suited.
After completing the installation work, cover the sashes with protective compounds and/or paint. This will increase the moisture resistance of the coating.
Photo No. 1: garage doors lined with plywood
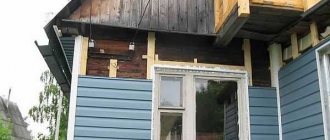
Covering garage doors with clapboard
Gates covered with clapboard look much more attractive, but such finishing involves more serious labor costs and will cost more.
Photo No. 2: garage doors covered with clapboard
During the work you will need:
- drill with drills for metal and wood;
- bolts, washers and nuts and keys;
- jigsaw;
- thin nails and a hammer.
The materials needed are lining and timber for the manufacture of guides.
To sheathe the outside of the gate, proceed according to the following scheme:
- Saw the timber into pieces of the required sizes (3-4 pieces for each sash).
- Mark the guides and sashes.
- Drill through holes in them. At the same time, do not forget that the bolt heads must be recessed.
- Attach the bars to the sashes.
- Cut the lining.
- Nail the strips to the guides with thin nails.
Important! With this option of decorative and protective finishing, you can additionally insulate the garage. To do this, before attaching the lining, place the material selected according to the thickness of the bars between the guides.
For finishing, colorless varnish is best, since paint will hide the natural texture of the wood.
Covering garage doors with siding
Siding is the most expensive finishing option. However, this material has a number of important advantages:
- Excellent technical characteristics. The panels are durable and resistant to precipitation and temperature changes. Gates covered with siding will retain a presentable appearance for decades.
- No finishing required. The material does not require painting or treatment with protective compounds.
- Easy to care for. The lining and plywood will have to be treated annually. The siding only needs to be washed periodically.
Photo No. 3: garage doors covered with siding
Garage door siding is covered using the same technology as in the case of lining. Additional insulation is possible.
Covering garage doors with corrugated sheets
This finishing option is also popular. Sheets of corrugated sheets are perfect for covering old metal gates.
Photo No. 4: garage doors covered with corrugated sheets
During the work you will need:
To sheathe the gate with corrugated sheets, proceed according to the following scheme:
- Take measurements.
- Cut out the sheets.
- Mark the material and sashes.
- Drill holes (the diameter should be less than the diameter of the screws).
- Screw the sheets to the sashes.
If you purchased painted corrugated board, no additional finishing is required.
How to sheathe a gate from the inside
Do you want to sheathe the inside of your garage door to create the most favorable conditions for preserving and repairing your car? Polystyrene foam, extruded polystyrene foam and foil-foamed polyethylene are suitable for this.
It is worth noting that automatic sectional garage doors do not require sheathing, since the thermal conductivity of high-quality sandwich panels is comparable to the same characteristic of a 0.6 m thick brick wall. Below we will look at methods of insulating traditional metal swing structures.
Garage door interior lining with polystyrene foam
Polystyrene foam is most often used to insulate garage doors for three reasons:
- Low cost. This insulation is the cheapest.
- Light weight. The load on the hinges will practically not increase.
- Durability. The material does not deteriorate at high air humidity.
Laying foam plastic will not take much time and effort.
- Preparation. Thoroughly clean the internal surfaces of the metal doors to remove any old finish and rust. Paint the gate and apply a layer of bitumen mastic for waterproofing.
- Creating a sheathing. For this purpose, wooden blocks selected according to the thickness of the foam and cut to the width of the sashes are suitable. Secure the strips with nuts and bolts. Their caps should be located on the outside of the gate. The optimal step for fixing the guides is 30–50 cm.
Photo No. 5: covering the gate with foam plastic
- Installation of insulation. Cut the foam into panels of the desired size. For fixation, use polyurethane foam, which also has thermal insulation properties, or any suitable adhesive.
If you want to create an additional protective layer and give the gate a finished and attractive appearance, cover the gates with plastic panels or sheets of plywood.
Important! To do this, you will have to make sure that the bolts do not stick out from the guide bars.
Garage door interior lining with extruded polystyrene foam
Extruded polystyrene foam is more expensive than regular polystyrene foam, but compared to it it has three advantages.
- The material is better suited for maintaining a comfortable indoor temperature due to reduced thermal conductivity.
- If you buy extruded polystyrene foam foiled on one side, no additional waterproofing will be required.
- Due to its high strength and rigidity, the insulation can be attached directly to the sashes. There is no need to do the sheathing.
Photo No. 6: gates lined with extruded polystyrene foam on the inside
To attach the panels to the sashes, use high-quality imported mounting adhesive. German quick-hardening liquid nails are perfect. Don't forget to seal the joints with foam.
Note! Plywood, lining, plastic panels and even wallpaper are suitable for finishing. In the latter case, you will have to putty the surfaces.
Internal lining of garage doors using foil-foamed polyethylene foam
Photo No. 7: foil-foamed polyethylene foam
The thermal insulation properties of this coating are lower than those of the materials described above. Foiled polyethylene foam is used as the main insulation only in regions with mild climates. For fixation, high-quality quick-hardening liquid nails are usually used.
Photo No. 8: garage doors lined on the inside with foil-foamed polyethylene foam
The main advantage of this coating is its excellent waterproofing. The flexible material fits even into the most difficult to reach places without any problems. Thanks to these qualities, foil-foamed polyethylene is excellent for creating combined cladding.
The ideal option is 3 layers.
- Foiled polyethylene foam.
- Extruded polystyrene foam.
- Foiled polyethylene foam.
This way you will get maximum thermal and waterproofing properties of the cladding.
Why you shouldn't use mineral wool
Many garage owners use mineral wool for insulation, but this should not be done (even if you use foil).
Photo No. 9: foiled mineral wool
This airy material perfectly absorbs water, which makes it unsuitable for use in garages where humidity levels are significantly higher than normal values. At first, mineral wool will provide the necessary thermal insulation, but over years of service it will lose its properties and become unusable. The sheathing will have to be redone.
How to insulate a garage door from the inside: let's look at the methods
Not all car owners have a garage, but most of them dream of having one. Not all happy owners of a garage have it insulated, but most of them who have at least once felt the beauty of insulation dream about it. And behind the apparent complexity of the insulation process there is a sequence of simple actions that any normal man can reproduce. In this article, car owners are invited to learn how to insulate garage doors from the inside, since they are the main source of overall heat loss.
How to insulate a garage door from the inside
Why insulate your garage door?
Car enthusiasts may ask a completely reasonable question: “Why, in general, insulate the gates and the garage itself? After all, this is a room where a person periodically appears in it, and the car is under the roof and protected from natural influences.” In words, everything seems to be so, but it is necessary to understand it in order. What are the arguments for insulating garage doors?
- The gate is the largest part of the garage by area, which connects it with external, not always favorable, natural conditions. It is through the gate that maximum heat transfer occurs: in winter, the necessary heat tends to escape, and in the hot summer, unnecessary heat penetrates inside the garage.
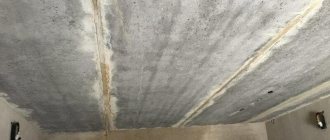
How heat “leaks” from the garage door is clearly visible on the thermogram
- Very often, garage owners organize workshops in them so as not to do the necessary carpentry or plumbing work at home; many car repair operations can be done in the garage, and this requires a long stay in it. Therefore, insulating the gates is simply necessary.
- Insulating the garage makes the temperature more mild, without sharp fluctuations, and this saves from moisture condensation both in the garage and on the car, and especially in its hidden cavities. In properly insulated garages, car bodies are less susceptible to corrosion.
Another fundamental question: should the gate be insulated from the outside or from the inside? Construction science recommends insulating solid walls from the outside and covering the insulation layer with plaster. Gates are a completely different design. Firstly, they need to be movable to open and close, and, secondly, they perform a protective and anti-vandal function, which is best done by a metal sheet. Therefore, it is advisable to insulate them from the inside.
What types of garage doors need to be insulated?
Most garage doors have a swing design, which, of course, simply needs to be insulated. The basis of such gates is a frame made of profile pipes and steel sheet as an external finish. The very high thermal conductivity of steel is known, so we can assume that such non-insulated gates do not pose any barrier to heat leakage. In swing gates, it is important to have a wicket gate, which greatly reduces heat loss when people move frequently. Therefore, if the garage is still at the construction stage, then you need to immediately order the gates that are insulated and with a wicket.
A wicket door in a garage door can significantly reduce heat loss
Very fashionable nowadays are up-and-over and sectional doors, the vast majority of which are factory-made. Their canvas or sections are a sandwich panel made of sheet steel on the outside and polyurethane foam on the inside. This design already has the necessary thermal insulation properties and does not require additional insulation measures. These types of gates, at the request of the customer, can also be equipped with a wicket door, which must be done.
Factory-made overhead and sectional doors already have thermal insulation made of polyurethane foam
There are home-made up-and-over gates, but in this case their insulation will not differ fundamentally from swing gates, since they are based on the same frame and steel sheet.
It is impossible to insulate roller gates due to the peculiarities of their design. Yes, and they can be called garage doors with a very big stretch, since in terms of thermal insulation and anti-vandal properties they are inferior to all others.
Choice of insulation
Insulation is a material that has minimal thermal conductivity. In construction science, thermal conductivity is assessed with a special indicator - the thermal conductivity coefficient. And the smaller it is, the greater the chance of this material becoming insulation.
Thermal conductivity coefficients of various building materials
In the presented table, its upper part is insulation materials, and the lower part (from No. 16 onwards) is building materials that need to be insulated. The insulation layer greatly slows down the transfer of thermal energy and the thicker this layer is, the better, but at the same time the principle of reasonable sufficiency is observed. For garage doors, a layer of insulation of 5 cm will be quite enough.
In today's wide selection of various building materials, there is a huge number of insulation materials under different names. It is very difficult to navigate them, especially for an inexperienced person, but in fact there are only a few main classes, some of which are suitable for insulating garage doors, and some of which are not.
Mineral wool
Mineral wool is a wonderful heat-insulating material that has proven itself very well in construction. Under this name there are actually three subtypes of insulation:
- Glass wool, consisting of the finest glass fibers (5-15 microns) with a length of 15 to 50 mm. It has the required low thermal conductivity coefficient of 0.03-0.05 W/m*°K, a wide range of permissible temperatures from -60 to +450 °C, good elasticity and strength. When working with it, always wear protective equipment, since the smallest fibers easily break, dig into the skin and enter the respiratory tract. The hygroscopicity of glass wool is moderate.
Glass wool is a good insulator, but requires a lot of precautions during installation and operation
- Slag obtained from metallurgical production waste - blast furnace slag. The fibers are thin - 4-12 microns, and the length is shorter than that of glass wool - approximately 15-16 mm. The thermal conductivity of this material is slightly higher than that of glass wool 0.040-0.050 W/m*°K, but quite acceptable. It is better not to use it for insulating a garage, since it is very hygroscopic and at the same time has acidity, which negatively affects the metal.
- Stone wool obtained by melting rocks of volcanic origin. Its structure is very similar to slag wool, but it has better heat resistance and lacks acid aggressiveness. The thermal conductivity of stone wool is 0.03–0.04 W/m*°K. Some types of this insulation use phenol-formaldehyde resins as a binder, so when heated, it can release phenols into the surrounding air, which are extremely harmful to humans. The hygroscopicity of this material is high.
Basalt wool is the most popular among all porous insulation materials.
All types of mineral wool are highly hygroscopic, so their use for insulating garage doors is limited, since moisture will condense in the insulation layer, reducing the thermal insulation properties of this material. Glass wool is dangerous to work with; slag wool has residual acidity, so only stone basalt wool is applicable, provided that vapor barrier films are used.
Styrofoam
Foam plastics are a fairly wide class of synthetic materials, the common thing of which is their foamed gas-filled structure, and the base is some kind of polymer. It is by the type of this polymer that foams can be classified.
- Polystyrene foam is the most famous and looks like sintered gas-filled balls. This type of foam is an excellent insulator and is used most often. Designated as PSB or PSB-S. In this class, the most interesting is extruded polystyrene foam (EPS), which has better strength, negligible hygroscopicity and fire resistance. For insulating garage doors, EPS is one of the best choices. In retail chains it may be called: Stirex, TechnoNIKOL, Penoplex, URSA XPS, etc.
Extruded polystyrene is very suitable for insulating gates
- Polyvinyl chloride (PVC) foams are used in construction for heat and sound insulation. Panels made from it can be rigid or elastic. This is an excellent material, similar to EPS, which has increased fire resistance. According to international standards, it is labeled as PVC. In retail chains it is less common than PSB or EPPS.
- Urea-formaldehyde foam (UFO) is widely used for thermal insulation. Its advantage is that it does not expand in volume when it dries, so on construction sites it is used in liquid form to fill cavities. Known in retail chains under the names: Mattamplast, Poroplast cf, Unipor, Omiflex, Penoizol, Pentyl. It can be used for thermal insulation of garage doors.
- Polyurethane foam (PPU) foam is known to us in two forms. Elastic polyurethane foam is nothing more than foam rubber, and hard polyurethane foam is polyurethane foam. Rigid polyurethane foam is suitable for thermal insulation purposes, as it has excellent adhesion to all surfaces, has excellent thermal insulation properties and is a waterproofing agent. Can be applied directly on the construction site by spraying. This is probably the best choice for garage door insulation. The only drawback is that applying the coating requires special equipment, which slightly increases the cost of thermal insulation.
Polyurethane foam thermal protection is applied to surfaces by spray
Prices for thermal insulation materials
Thermal insulation materials
How to insulate a garage door from the inside
Judging by the types of garage door designs described earlier, insulation is required, first of all, by swing gates, as well as up-and-over gates manufactured independently. Before you start insulating, you should check the ventilation system in the garage. Why is this being done?
Garage ventilation layout
- Any garage must be provided with a ventilation system: supply and exhaust. Very often the supply hole is made in the gate, so this must be taken into account when insulating. The insulation should not block the ventilation hole.
- It happens that the supply ventilation is “organized” due to the loose fit of the garage door leaves. It is unacceptable! If the garage does not have an air supply hole, then it should be organized at the bottom of the door.
Find out how to insulate a garage floor with your own hands from our new article.
Preparing the gate surface
Before starting work on thermal insulation of the gate, it is necessary to prepare the inner surface of the gate, which may have pockets of corrosion, old peeling paint, various contaminants, etc. To do this, you need to:
- Large pockets of corrosion, where there are peeling layers of rust, are cleaned with a brush with metal bristles.
- Next, it is better to resort to mechanized processing of the gate surface using a brush attachment on a drill.
Cleaning rust with a special brush attachment on a drill
- The best results are obtained by cleaning rust with a polymer-abrasive “Piranha” brush, which works in conjunction with an angle grinder. Working with it is absolutely safe, but you should not forget about protective equipment. When working, you can water the surface; the polymer bristles penetrate into the most inaccessible places. Considering that angle grinders (grinders) operate at high speeds, the cleaning process goes very quickly.
A polymer abrasive brush together with a grinder will very quickly clean the surface of the gate from rust
- After complete cleaning and degreasing, an anti-corrosion primer is applied in two layers. You can use any suitable one. If the primer is applied with a brush, then the second layer is applied perpendicular to the first. It is best to use aerosol cans - the quality of the coating will be better.
Making lathing for insulating gates
With any method of thermal insulation, using any materials, the design of the gate leaf will require a lathing, which, firstly, will help secure the insulation, and, secondly, the gate lining will be attached to it in the future. To make the lathing, you will need wooden blocks with a cross-section of 4*4 cm or 5*5 cm, depending on the design of the gate. The lathing must be attached to the load-bearing frame of the gate leaf: a profile steel pipe or angle. To make a wooden sheathing you need:
- Prepare the required number of wooden blocks. When purchasing, you need to choose only dry wood.
- The bars are treated twice with an antiseptic composition to prevent them from rotting under difficult conditions of temperature changes and high humidity.
The wooden parts of the sheathing are treated with antiseptic compounds
- The bars are attached to the gate's strength elements using screws. To do this, after marking, you need to mark the locations of future holes, and then use a drill with a diameter corresponding to the screw to make through holes. When attaching the bars, do not forget to first make holes in them with a thin drill so that the screw being screwed in does not split them.
Lathing fastening option
- If there is a ventilation hole on the door leaf, it must be surrounded by lathing around the perimeter. This also applies to locks and deadbolts.
- If there are no steel strength elements on the central part of the door leaf, then the bars can be fastened to each other in any convenient way: at the end, using corners, etc.
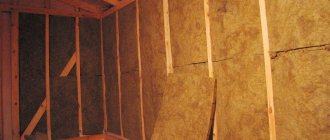
Insulation of garage doors with mineral wool
If you have already decided to insulate the gate with mineral wool, then it is better to choose basalt wool from well-known manufacturers. But before laying insulation, you need to take care of waterproofing, since mineral wool is a very hygroscopic material. For these purposes the following can be used:
- The inside of the gate can be covered with waterproofing mastic, for example, bitumen-polymer.
- Self-adhesive materials Isolon or any other give very good results.
After waterproofing the surface of the gate, you can cut the insulation into pieces of such a size that they fit very tightly between the sheathing bars. Mineral wool can cake over time, so the denser the better. After laying all the insulation, a vapor barrier film is stretched on top and attached to the sheathing bars with a construction stapler. After this operation, we can say that the gate is ready for final cladding.
The process of insulating gates with mineral wool
Use the calculator to calculate the thickness of internal insulation “mineral wool + plasterboard”.
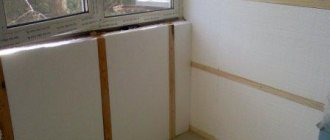
Insulating gates with foam plastic
If regular PSB foam is used to insulate the gate, then the use of waterproofing is also desirable. This material is capable, although not in the same way as mineral wool, of absorbing moisture, which reduces its thermal insulation properties. It is advisable to use EPS, which is not hygroscopic. Extruded polystyrene foam, although more expensive, does not require waterproofing. To install polystyrene foam on the gate surface you must:
- After measuring the space between the sheathing bars, a plan for cutting the foam sheets is drawn up. The main rule is a minimum of joints. It is necessary to take into account that the size of the cut sheets should be 2-3 mm larger than the cell size - the foam should fit into place very tightly. You can cut foam plastic with a construction knife using a ruler.
Video: How to properly cut foam with a knife
- Foam sheets can be glued to the surface of the gate using polyurethane foam. It is better to use professional foam supplied by a gun, since its volumetric expansion is small. For gluing, foam is continuously applied to the back of the sheet along all edges of the sheet and one line in the center parallel to the long side. Next, the sheet is installed in its place and pressed firmly with a block or rule. By tapping you can adjust the position of the sheet. After a few minutes the position is checked and adjusted if necessary.
Video: How to glue polystyrene foam with polyurethane foam
- After installing all the sheets, all joints and cavities are treated with polyurethane foam. After the foam has dried, the excess is cut off and the surface can be lightly processed with a grater. The gate is ready for cladding.
Insulation of gates with polyurethane foam
When insulating gates using this method, it is no longer possible to do without the involvement of qualified labor and special equipment. Polyurethane foam is applied using a special spraying machine in several layers. Wooden sheathing is still needed, since it is convenient to attach the finishing cladding of the gate to it.
Insulating gates using polyurethane foam spraying has clear advantages:
- Polyurethane foam (PPU) has excellent adhesion to almost all surfaces, and its properties do not change over time.
- The thermal insulation properties of polyurethane foam are very high - its thermal conductivity coefficient is 0.019-0.035 W/m*°K.
- When applying polyurethane foam by spraying, no cavities remain and no “cold bridges” are formed.
- Polyurethane foam is an excellent water and vapor barrier, so additional waterproofing is not required.
- According to manufacturers, the service life of thermal insulation made of polyurethane foam is at least 70 years.
Video: Applying polyurethane foam coating to a garage door
Before applying the coating, you should cover the gate hinges, locks, bolts and ventilation holes with film, pasting it around the edges with masking tape. Coating is applied only in protective clothing, goggles and a respirator. After applying the calculated layer of insulation and its complete drying, the excess on the sheathing can be trimmed with a construction knife. After this, the gate is ready for cladding.
Lining the inner surface of the gate
The main thing has already been done! Garage doors are already equipped with thermal insulation, but aesthetics and practicality have not yet been canceled, so it is best to line them with some kind of material. What can serve as cladding?
- Cladding with corrugated sheeting is a practical solution, but based on the experience of people who have done this, moisture can condense on the surface.
- Cladding with plastic lining - looks good, easy installation, but the surface is very easy to damage.
Garage doors finished with clapboard
- Cladding with wooden lining is one of the most practical and beautiful solutions, but the wood must be treated with antiseptics and fire retardants.
- Cladding with OSB sheets (oriented strand boards). This option is perhaps the best, since OSB sheets are not subject to rotting, have the required strength and have a beautiful appearance. If desired, you can paint the surface in any preferred color.
Cladding the gates with OSB slabs is both practical and looks beautiful.
The cladding is fastened to the sheathing bars using screws with a press washer.
Additional measures for insulating garage doors
Gate leaf seals
One of the main ways that precious heat is lost from the garage is through loose fitting of the gate leaves. Very rarely do they fit so tightly together that they exclude any air movement. Therefore, it is always necessary to use seals, which come in different profiles and sizes.
Rubber seal for gate leaves
For a tight fit of gate leaves and wickets, a round rubber seal with a diameter of 20 mm has proven itself best. Due to the rubber tail, this seal can be easily attached to any door. To do this, take a perforated steel strip and press the tail of the seal in a pre-designated place and screw it with self-tapping screws in increments of 15-20 cm to the gate leaf. It is advisable to coat the tail of the tape with glue No. 88 before installation.
The seal is very convenient to attach using mounting tape
Another area where heat can escape from the garage is the bottom of the door. Naturally, you cannot do without a gap in this place. Rubber seals are not suitable for this purpose, but there are special brush profiles specifically designed to seal the bottom of the gate. Installation of this profile is quite simple - it must be screwed to the bottom of the gate with self-tapping screws in increments of 15-20 cm. At the same time, when completely closed, the brushes should bend by about a third of their length.
There are special brushes to seal the bottom edge of the gate.
Garage curtain
A significant plus in saving heat in the garage in winter is the garage curtain, which is hung directly behind the gate. The curtain material must meet certain requirements:
- The material must be dense, since lightweight materials do little to prevent heat loss.
- Resistance to high humidity and mold.
- Fire resistance.
- Strength and elasticity.
All these requirements are perfectly met by an ordinary tarpaulin, however, with a small caveat - it must have a water-repellent impregnation. They also make curtains from heavy PVC fabric, but tarpaulin is still beyond competition.
The best material for a garage curtain is tarpaulin. It is worth purchasing along with eyelets
Along with the tarpaulin, you should also purchase eyelets, which are inserted into the fabric at a distance of 20 cm. The panel is suspended on a cable or (which is better) a metal curtain rod using rings inserted into the eyelets of the curtain. Opposite the gate, a cut must be made in the curtain fabric to allow free movement without moving the entire panel.
Conclusion
- Insulating your garage and garage doors is not overkill. These measures will allow you to better preserve the car, which is comfortable in the garage both in cold winter and hot summer.
- Garage doors are only insulated from the inside.
- The best method of insulation is spraying a polyurethane foam layer of thermal insulation.
Video: Garage door insulation option
Video: Another insulation option
How to properly sheathe a garage door with your own hands
To properly sheathe your garage door with your own hands from the outside and inside, carefully study the following professional advice:
- Fix materials to surfaces and joints as tightly as possible and pay special attention to sealing joints. Maximum exclusion of air layers will give tangible results.
- If the gate does not have a wicket, install one. The amount of heat loss will be significantly reduced.
- After cutting, finish the edges of the panels. In this case, the materials will not crumble. You will get perfect joints.
Important! If your garage has very thin walls, you can create a good microclimate only if you line the entire structure.
Methods of additional insulation
There are two good ways to provide additional insulation.
Awning manufacturers market a wide range of single- and multi-layer tarpaulin and PVC canopies. Products equipped with eyelets are excellent for additional insulation of garages.
Photo No. 10: garage insulated with a tarpaulin canopy
To hang a curtain:
- weld the steel cornice;
- fix it above the doorway;
- tie a rigid metal wire on one side;
- thread the free end through the eyelets of the canopy;
- raise the curtain and complete the installation.
Sealers for cracks
To seal the side and top cracks, buy a roll of sealant at the construction market. Silicone self-adhesive tape is best. It is characterized by reduced thermal conductivity. Installation will take place as quickly as possible and will not require the use of adhesives.
Image #1: Self-adhesive silicone tape
To seal the bottom cracks, buy special wax-coated nylon brushes. Their installation will not complicate the operation of the gate.
Photo #11: Wax coated nylon brush
Preparing for insulation
To insulate a garage door with polystyrene foam, you must complete the following steps:
Before you insulate your garage door, its inside surface must be cleaned. This is done using an iron brush. Particularly large and deep areas of metal corrosion on garage doors can be cleaned using a brush attachment on a drill. After which you need to seal and, if necessary, weld all the cracks and holes on the surface of the gate.
To prevent further formation of corrosion foci, it is necessary to treat the cleaned surface of the gate with some kind of anti-corrosion agent or antiseptic. For these purposes, a completely suitable remedy is heated drying oil, or even better, bitumen mastic. It is applied with a regular wide paint brush in two layers, perpendicular to one another.
After the anti-corrosion coating has dried, it is necessary to create a paving sheathing. It will become the basis for laying and securing insulation from foam boards. This lathing is made from bars with a cross section of 40x40 or 50x50 millimeters. The cross-section of the sheathing bars depends on the width of the end corners of the gate.
It is desirable that the bars are solid. The dimensions of the sheathing cells should be selected in such a way that they best match the dimensions of the foam boards. The sheathing must be attached to the end corners of the gate. To do this, holes of 4 mm diameter are pre-drilled in the latter. The pitch between such holes should not exceed 200-250 millimeters. Next, the sheathing bars are fastened through the drilled holes with self-tapping screws.
If the design of the garage door is such that it does not imply the possibility of removing the gate from the hinges, a slight problem may arise with attaching the sheathing bar to the lower end corner due to the inability to reach there with a screwdriver or even an ordinary screwdriver. In this case, the block must be secured exclusively at the end. By the way, it is also better to treat the bars with some kind of antiseptic before fixing them. If the gate or wicket has locks, bolts or a ventilation hole, the sheathing must bypass these elements.
When the inner surface of the door is cleaned, treated with anti-corrosion and antiseptic agents, and the lathing is securely fastened, you can begin insulating the garage door with your own hands using polystyrene foam. What does it mean to insulate a garage door with foam? This means covering as much of the gate's surface area as possible with foam. If the dimensions of the sheathing cells do not correspond to the dimensions of the foam plastic slabs, then these same slabs must be adjusted to the size of the cells by cutting them with a penknife or an ordinary, but thoroughly sharpened knife along a ruler.
The slabs are cut into pieces based on the width of the cell plus 2-3 millimeters. The same goes for heights. This is done so that the foam boards fit into the cells of the sheathing as tightly as possible.
This installation system will help solve two problems:
- The foam insulation will be securely clamped between the sheathing bars, which will eliminate the possibility of it sagging and falling out. In this case, no additional seal for the garage door will be needed.
- Thanks to such a dense laying of the foam, the insulating effect increases significantly. In this case, no additional sealing is required either.
For additional fixation of foam boards, you can use polyurethane foam as glue. However, insulating gates with polyurethane foam is a very risky business. Why is that? Let us explain: when drying, polyurethane foam tends to expand, creating pressure on the foam board and pushing it out of the sheathing cell. Therefore, for more convenient and comfortable fixation, we recommend using adhesives specially designed for such purposes.
As for polyurethane foam, you also cannot do without it. This product is ideal for sealing gaps between the sheathing and the insulation, if any. This is where its expansion properties come in handy. In this case, the foam, expanding, not only presses the insulation against the sheathing frame, but this also achieves better sealing of the insulated surface, for example, swing gates. After drying, excess foam must be trimmed flush (level) with the sheathing frame.
As an additional insulation measure, you can install a seal for the garage door. This, in fact, rubber or silicone gasket is attached to the ends between the gate leaves. This ensures a tighter fit of the ends of the garage doors to each other, which prevents the penetration of cold air masses into the garage. Such seals are attached using a perforated metal strip and self-tapping screws.
The final stage of insulating garage doors with your own hands is their surface cladding.
To cover the gate, you can use OSB sheets, plastic or wooden lining or corrugated sheets as cladding material. Each of these facing materials has both its plus and minus. Let's take a brief look at them, and at the same time decide what is better to sheathe garage doors.
- Wooden lining. It is one of the most beautiful and practical solutions for facing the door leaf. However, they require pre-treatment with some kind of fire retardant and antiseptic.
- Oriented Strand Board (OSB). Beautiful looking, durable and rot-resistant material. Can be painted or glued.
- Plastic lining. Easy to install and looks attractive. But the strength of this cladding material leaves much to be desired.
- Profile iron sheet. Durable, practical and durable material. However, as experienced garage owners assure, it is better not to cover the door leaf with a profile sheet. The reason for this is a fairly high probability of condensation forming on the side where the insulation is located.
As you can see, of the above facing materials, OSB is the most optimal. Therefore, if you are deciding how and how to insulate garage doors from the inside with your own hands and what to cover them with, oriented strand boards are the optimal material for this.
The optimal board for cladding gates is OSB.
In conclusion of all of the above, we would like to once again point out the importance of the fact that you need to approach the question of how to insulate a garage door with your own hands with full responsibility. A high-quality and reliably insulated garage door with your own hands is a guarantee of a constant acceptable temperature, and therefore the longevity of your mobile vehicle.
How to cover sliding gates
Do you want to cover your sliding gates yourself? There are two options:
- Buy the necessary tools, materials and components and do everything yourself (which is extremely difficult).
- Order the production and installation of sliding gates without filling the frame at a competitive price in Moscow.
Next, we will talk about how to cover the gates on the street and show interesting design solutions.
Note! Filling the frame yourself will not require significant time investment. Sheathing involves only fastening selected materials using screws or welding.
Covering sliding gates with corrugated sheets
Corrugated sheeting is the most popular material for cladding sliding gates. Galvanized steel sheets treated with high-quality paints combine:
- low cost;
- wide choice of color and design solutions;
- light weight;
- resistance to adverse weather conditions and temperature changes;
- long service life.
Photo No. 12: sliding gates covered with corrugated sheets
Covering sliding gates with European picket fences
Covering sliding gates with European picket fences will help maintain the area's airflow. The structure will not experience serious wind loads.
Photo No. 13: sliding gates lined with Euro picket fence
Covering sliding gates with wood
Wood is an excellent choice for those who want to combine modern technology and traditional natural materials. This option for filling the frame has one important drawback. Gates lined with wood will have to be regularly treated with protective compounds.
Photo No. 14: sliding gates covered with wood
Covering sliding gates with sandwich panels
Covering sliding gates with sandwich panels is popular when decorating street and sectional garage structures in the same style. To fill the frame you will need a welding machine. The result is a rigid structure. Sandwich panel fabric does not make loud sounds when moving.
Photo No. 15: sliding gates covered with sandwich panels
How and with what to sheathe swinging garage doors for insulation
Often, garage owners line the gate with polystyrene foam, spray it with polyurethane foam, and cover it with clapboard or siding. Why insulate a garage that usually does not have central heating? There are several arguments in favor of insulation.
- Usually the cold enters the garage first of all through the gates, since they are usually sheets of iron attached to metal corners, without any layer of insulation. The walls take longer to cool.
- Often the garage is used not only as a place to store the iron horse, but also as a workshop or as a room for meeting friends. Heating can be provided by an electric battery, and the gate trim will protect against rapid cooling.
- Condensation, which can form due to sudden cooling or heating, which happens in spring or autumn, is harmful to the car. Insulation on the gate will help avoid sudden temperature fluctuations inside the garage.
Today there are many offers for insulation on the market, but they are quite expensive. We recommend that you save money and use the instructions from the article on how to cover the garage door. And how to do it yourself.