Who needs a wood-burning generator?
A wood-burning electric generator is most suitable for providing a backup power source in a country house or in a small house, as well as as the main autonomous source of electricity on a hike or during outdoor recreation.
In addition to generating electricity, the stove-generator performs the main function of heating the room ; in addition, you can cook food on it and boil water.
The electric generator does not produce a constant electric current of 12 volts. If you connect an inverter, you can convert direct current to alternating current 220 volts.
Pros and cons of the device
Like any device, a wood-burning electric generator has its advantages and disadvantages . By comparing them, you can understand how much you need such a stove and which one to choose.
Advantages
- Possibility of heating a room up to 50 m3 and cooking,
- Compactness,
- Long service life,
- The ability to use not only firewood, but also wood waste,
- Low energy cost,
- Possibility to make it yourself.
Flaws
- High price of a finished generator furnace,
- Low power (approximately 50-60 W) and mains voltage (12 volts).
Basically, a wood-burning electric generator allows you to connect lighting in a small house and provide charging for phones and other gadgets.
You can connect a radio or portable TV. If necessary, you can use an inverter to obtain a higher voltage in the network, that is, the usual 220 volts. Today, different models of wood-burning generators are produced: from compact devices weighing up to 1 kilogram, which are convenient to take with you outdoors, to autonomous wood-burning power plants producing up to 100 kW, which can provide electricity for small production.
Be careful when operating wood-burning generators, because these are devices with “live” fire. Be sure to follow safety precautions , especially when using homemade ovens.
First tests!
After work I went into the forest, the sun had almost set, the brushwood was wet, but the stove paid off 100%.
The result exceeded all my expectations. Immediately after the wood chips burned, the indicator came on, I connected the phone and it began to charge. Charging was stable.
The converter didn't strain at all. I also took with me a cooling pad for the laptop, it has 2 coolers and LEDs, it should consume a decent amount. I connected it, everything spins, glows, and the breeze blows. I also took a USB fan and connected it at the end, when there were only coals left. Everything is spinning great, I don’t even know what else to try.
Thermoelectric generators
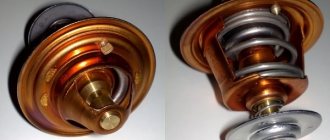
Power plants with generators built according to the Peltier principle are quite an interesting option.
Physicist Peltier discovered an effect that boils down to the fact that when electricity is passed through conductors consisting of two dissimilar materials, heat is absorbed at one of the contacts, and heat is released at the other.
Moreover, this effect is the opposite - if the conductor is heated on one side and cooled on the other, then electricity will be generated in it.
It is the opposite effect that is used in wood-fired power plants. When burned, they heat up one half of the plate (it is a thermoelectric generator), consisting of cubes made of different metals, and the second part is cooled (for which heat exchangers are used), as a result of which electricity appears at the terminals of the plate.
But such a generator has several nuances. One of them is that the parameters of the released energy directly depend on the temperature difference at the ends of the plate, therefore, to equalize and stabilize them, it is necessary to use a voltage regulator.
The second nuance is that the energy released is just a side effect; most of the energy when burning wood is simply converted into heat. Because of this, the efficiency of this type of station is not very high.
The advantages of power plants with thermoelectric generators include:
- Long service life (no moving parts);
- At the same time, not only energy is generated, but also heat, which can be used for heating or cooking;
- Quiet operation.
Wood-burning power plants using the Peltier principle are a fairly common option, and they produce both portable devices that can only release electricity to charge low-power consumers (phones, flashlights), and industrial ones that can power powerful units.
Brick stove designs for home
Based on the principle of construction, the furnace can be divided into two types:
- Duct with forced movement of gases.
- Bell-type with free movement of gases.
Let's briefly look at the difference between them. Duct ovens are the familiar Dutch ovens, multi-turn ovens, etc. They have a firebox from which a smoke channel extends. Combustion products are discharged through it. Since the gases in the firebox have a high temperature, the main task of such stoves is to keep them in the stove for as long as possible so that they give maximum energy to the walls, and they, in turn, to the air in the room.
Sectional view of a channel furnace: a large number of narrow passages for maximum heat transfer
In principle, everything is clear and logical. But there are difficulties and nuances:
- Such a stove operates only when there is draft. Narrow channels create great resistance to air flow; to overcome it, a significant pressure drop is required, which is created by lifting the pipe to a considerable height. Therefore, chimneys must be high.
- Due to the design features, the upper part of the stove is hotter, since the smoke channels are located above the firebox, i.e. at the top, then most of the heat is concentrated there. So the rooms at floor level are often cold, and those above are hot.
- To regulate the intensity of combustion, manipulation with dampers/views and doors is required. And this comes with experience.
- The efficiency of even the best units is rarely above 60%. The average is 40%.
- The inertia of the stove is very high: due to the large amount of solid brick, the stove takes a long time to heat up, but it also takes a long time to release heat.
- The heat exchanger, if present, is located in the firebox, which makes its lifespan very short. The second disadvantage is the deterioration of fuel combustion conditions: cold water takes away a significant part of the energy, the temperature in the stove drops, wood burns worse, and more soot is formed. Therefore, such options are far from the most popular.
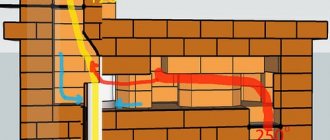
Now about furnaces with free movement of gases. They use the principle described by Lomonosov, then developed by Professor V. E. Grum-Grzhimailo and modified by Kuznetsov. As you know, hotter gases have less weight and rise upward, while colder gases sink down. The operation of bell-type furnaces is based on this natural phenomenon. In them, the firebox is combined with a combustion chamber and has a large volume. The oven also has a second, and sometimes a third, chamber. They are connected to each other by a dry seam - a free space of 2-3 cm not filled with mortar. Moreover, this dry seam is located at the bottom of the chamber.
The principle of gas movement in bell furnaces
It all works as follows: hot gases rise up into the first bell. There they remain until they cool down, giving off heat to the walls of the bell. After which they fall lower, displaced by hotter gases coming from the firebox. Thus, the roof of the bell is constantly heated because it contains the hottest part of the gases. Cooler gases enter the second bell through the dry seam, where hotter ones rise upward again. The process is repeated, the roof of the second bell also heats up, but not as intensely as the first: the temperature of the gases in it is much lower. On the opposite side of the entrance, in the second hood there may be an exit to the smoke channel, or perhaps a transition to the third hood.
Bell-type stoves are very flexible: it’s easy to turn a stove on one floor into two. You just need to pull the caps up
This scheme is good because it does not require a high chimney. Any device can be built into the second cap, and it will not have any noticeable effect on the temperature in the first. Moreover, the cameras can be placed in horizontal and vertical order; there can be two of them, or there can be many. You can build both a mini-oven and a huge multifunctional complex. Moreover, the construction of a dome (bell-shaped) stove requires less material (more voids), less firewood is required to heat it, and it gives off heat longer. And indeed it is. Despite the smaller amount of bricks that heat up, this option maintains the temperature much better: the hottest air is located under the arch of the caps, and the coldest air goes into the pipe. This is how many small advantages give one big one: the efficiency of such furnaces is 80% or higher. Read more about Kuznetsov stoves and the features of their masonry here.
Representatives of factory-made power plants
Let us note that the indicated options – a thermoelectric generator and a gas generator – are now a priority, therefore ready-made stations are produced for use, both domestic and industrial.
Below are a few of them:
- “Indigirka” stove;
- Tourist stove “BioLite CampStove”;
- Power plant "BioKIBOR";
- Power station "Eco" with gas generator "Cube".
Stove "Indigirka".
An ordinary household solid fuel stove (made like a Burzhaika stove), equipped with a Peltier thermoelectric generator.
Perfect for summer cottages and small houses, as it is quite compact and can be transported in a car.
The main energy from burning wood is used for heating, but the available generator also allows you to obtain electricity with a voltage of 12 V and a power of 60 W.
BioLite CampStove stove.
It also uses the Peltier principle, but it is even more compact (weighs only 1 kg), which allows you to take it on hiking trips, but the amount of energy generated by the generator is even less, but it will be enough to charge a flashlight or phone.
Power plant "BioKIBOR".
A thermoelectric generator is also used, but this is an industrial version.
The manufacturer, upon request, can produce a device that provides output electricity with a power of 5 kW to 1 MW. But this affects the size of the station, as well as the amount of fuel consumed.
For example, an installation that produces 100 kW consumes 200 kg of wood per hour.
"Eco".
But the Eco power plant is a gas generator. Its design uses a “Cube” gas generator, a gasoline internal combustion engine and a 15 kW electric generator.
In addition to ready-made industrial solutions, you can separately buy the same Peltier thermoelectric generators, but without a stove, and use it with any heat source.
Model overview
You can buy a wood-burning electric generator from specialized companies.
Portable models
They are represented by wood chippers and grills equipped with an electrical converting element. This stove is good for heating food on a hike; you can use it to warm a mug of tea, fry a small piece of meat, and charge your gadgets at the same time. not designed for more .
For example, the BioLite CampStove stove can operate on any wood fuel: twigs, chips, cones. It produces up to 5 W of power and is equipped with USB. To boil a liter of water, just a little wood is enough, and it will take literally 5 minutes. The price of BioLite CampStove is 9,600 rubles .
Indigirka
The Indigirka stove is the most famous model of wood-burning electric generators. This stove heats a room up to 50 m3, weighs 37 kilograms, is made of heat-resistant steel and lasts for decades. Firebox volume – 30 liters. Indigirka's output voltage is 12 volts, maximum output power is 50 W. Of course, the main purpose of the stove is heating; a convenient cast-iron burner allows you to cook food or warm tea. As an electric generator, the stove is able to work within 15 minutes after ignition.
We recommend: How to finish and cladding a fireplace with marble?
Homemade stations
Also, many craftsmen create homemade stations (usually based on a gas generator), which they then sell.
All this indicates that you can independently make a power plant from available materials and use it for your own purposes.
Next, let's look at how you can make the device yourself.
Based on a thermoelectric generator.
The first option is a power plant based on a Peltier plate. Let us immediately note that a device made at home is only suitable for charging a phone, a flashlight, or for lighting using LED lamps.
For production you will need:
- A metal body that will play the role of a furnace;
- Peltier plate (purchased separately);
- Voltage regulator with installed USB output;
- A heat exchanger or just a fan to provide cooling (you can take a computer cooler).
Making a power plant is very simple:
- We make a stove. We take a metal box (for example, a computer case) and unfold it so that the oven does not have a bottom. We make holes in the walls below for air supply. At the top you can install a grate on which you can place a kettle, etc.
- We mount the plate on the back wall;
- We mount the cooler on top of the plate;
- We connect a voltage regulator to the terminals from the plate, from which we power the cooler, and also draw terminals for connecting consumers.
POPULAR WITH READERS: GSM alarm system - security of your home, cottage, garage under your control
It works simply: we light the wood, and as the plate heats up, electricity will begin to be generated at its terminals, which will be supplied to the voltage regulator. The cooler will start working from it, providing cooling of the plate.
All that remains is to connect the consumers and monitor the combustion process in the stove (add firewood in a timely manner).
Based on a gas generator.
The second way to make a power plant is to make a gas generator. Such a device is much more difficult to manufacture, but the energy output is much greater.
To make it you will need:
- Cylindrical container (for example, a disassembled gas cylinder). It will play the role of a stove, so hatches should be provided for loading fuel and cleaning solid combustion products, as well as an air supply (a fan will be required for forced supply to ensure a better combustion process) and an outlet for gas;
- A cooling radiator (can be made in the form of a coil) in which the gas will be cooled;
- Container for creating a “Cyclone” type filter;
- Container for creating a fine gas filter;
- Gasoline generator set (but you can just take any gasoline engine, as well as a regular 220 V asynchronous electric motor).
After this, everything must be connected into a single structure. From the boiler, gas should flow to the cooling radiator, and then to the “Cyclone” and a fine filter. And only after that the resulting gas is supplied to the engine.
This is a schematic diagram of the manufacture of a gas generator. Execution can be very different.
For example, it is possible to install a mechanism for forced supply of solid fuel from a bunker, which, by the way, will also be powered by a generator, as well as all kinds of control devices.
When creating a power plant based on the Peltier effect, no special problems will arise, since the circuit is simple. The only thing is that you should take some safety measures, since the fire in such a stove is almost open.
But when creating a gas generator, many nuances should be taken into account, among them is ensuring tightness at all connections of the system through which gas passes.
In order for the internal combustion engine to operate normally, you should take care of high-quality gas purification (the presence of impurities in it is unacceptable).
The gas generator is a bulky design, so it is necessary to choose the right place for it, as well as ensure normal ventilation if it is installed indoors.
Since such power plants are not new, and they have been manufactured by amateurs for a relatively long time, a lot of reviews have accumulated about them.
Basically, they are all positive. Even a homemade stove with a Peltier element is noted to completely cope with the task. As for gas generators, a clear example here is the installation of such devices even on modern cars, which indicates their effectiveness.
Design and principle of operation of a wood-burning gas generator
Wood-burning gas generators are fired in the same way as conventional boilers. Moreover, here and there, solid fuel is used - wood. Firewood, sawdust, briquettes or other fuel are placed in a chamber located at the bottom of the gas generator. After this, the fire is ignited and the damper is opened to create draft. Also, you should pay attention to the fact that the damper opens only halfway, as the fire may go out. The reason for this is excess incoming air.
Design and operating diagram of the gas generator
The design of the gas generator is very simple; it is based on two chambers located in one housing. Fuel is burned in the lower compartment, and gas is burned in the upper compartment. Heated air constantly circulates through the pipelines.
The lower chamber has special openings for cold air intake. When heated, it rises and then enters the channel.
To obtain flammable gas from wood, it is necessary to provide special combustion conditions. To do this, a small amount of oxygen is supplied to the firebox, which prevents the fuel from simply burning. In this case, the temperature in the combustion chamber must be very high, more than 1100 degrees.
The wood-burning generator was used successfully for automobiles as early as World War II. Today, this idea is increasingly being returned for reasons of environmental safety.
As a result, a mixture of flammable gases is formed, which must be cooled. After this, the gas is passed through a series of filters to remove acetic and formic acid, ash, suspended particles, etc. The purified gas is fed into a mixer, where a certain amount of air enters it. This gas-air mixture is suitable for further use, for example, for heating water in a heating circuit or as fuel for an internal combustion engine. Understanding the principles of operation of the device will help when creating a wood gas generator with your own hands.
Please note that there is another type of wood-burning gas generator - a pyrolysis oven. It also produces flammable gases that enter the secondary combustion chamber rather than being removed for further use.
In general, the idea of a wood-burning gas generator is not new, and in recent years environmentalists have advocated the use of such units for cars. The following video demonstrates the successful experience of creating a car gas generator that runs on wood.
Video: manufacturing and launching a gas generator
Advantages and disadvantages of the unit
Among the advantages of using gas generators, the following should be noted:
- quite high efficiency, which can reach 80-95% (for comparison, 60% efficiency for solid fuel boilers is considered a very good achievement);
- a long fuel combustion process, which eliminates the need to frequently add fuel (wood can burn for up to 25 hours, coal combustion can last up to 5-8 days);
- complete combustion of fuel, so the procedure for cleaning the ash pit and flue is carried out very rarely;
- the controlled combustion process can be automated;
- during operation, a minimum amount of harmful substances is released;
- home heating costs are reduced;
- You can load logs up to one meter long into the firebox;
- In some generator models, you can use freshly cut wood or wood with a moisture content of 50%.
The ability to automate the operation of the device, as well as the materials used in their creation, make a wood-burning gas generator safer than a traditional solid fuel boiler.
As fuel for the gas generator, you can use not only firewood, but also peat, coal, sawdust, old parquet, and some other waste
However, this unit also has a number of disadvantages that should be taken into account:
- Most models use an electric fan to supply air, due to which the device can be considered energy-dependent.
- When the generator power decreases by more than 50%, combustion loses stability, resulting in the release of tar that pollutes the flue.
- To avoid condensation, the heating treatment temperature must be maintained at 60 degrees or more.
In addition, the cost of generators offered by industrial production is almost 2 times higher than the cost of purchasing a solid fuel boiler. You can significantly reduce these costs by making the unit yourself.
Making a wood-fired electric generator with your own hands
The basis of the device is a Peltier element. It can be purchased specially or removed from the computer (it is located between the processor and the heatsink).
In addition to this, for the unit to operate you will need:
- voltage stabilizer, also known as a module with USB output;
- metal for the case (you can use the case from an old power supply);
- cooling radiator and cooler;
- thermal paste;
- tools – riveter, metal scissors, drill;
- soldering iron;
- rivets.
First, the body of the wood chipper is made (on which you can boil water in a saucepan using small brushwood).
This is a square jar without a bottom, has holes for air on the bottom, and a stand on top for a container (although this is not necessary, the generator will work without water).
A Peltier element is attached to the side of the case, and a cooling radiator is attached to its cold side through thermal paste. It is important that the contact between the parts is as tight as possible. This creates the basis of a generator furnace.
The radiator must cool the system as best as possible, since the greatest efficiency is achieved with a large temperature difference. There will be no problems in winter, since the device can be placed in the snow. But in the warm season, the radiator will gradually heat up, so a cooler is installed to cool it.
Next is the electrical part. It’s good if you managed to find a voltage stabilizer in the same case with a USB socket - it will be convenient.
A stabilizer is needed to ensure that the output always has the specified voltage, regardless of how much the generating element produces.
You can purchase a ready-made one with a diode indicator that lights up when the voltage reaches a predetermined value.
The stabilizer and Peltier are soldered according to the poles. The stabilizer is carefully insulated to prevent any moisture from entering.
The design is ready, testing can be carried out.
Making a gas generator with your own hands
You can draw up a diagram of the gas generator yourself, having studied the principle of its operation, or use a drawing of a finished boiler as a basis and assemble its analogue. Craftsmen even independently assemble gas generators designed to generate electricity using wood.
To make a wood-burning gas generator for a motorcycle with your own hands you will need:
- 100-liter metal barrel;
- thick-walled pipe with a diameter of 160 mm;
- filters for fine and coarse cleaning;
- stainless steel kettle;
- mower disc;
- hexagon;
- low temperature battery;
- pipe with squeegee;
- fire extinguisher;
- metal can;
- receiver.
Scheme of a gas generator installation for DIY production
Holes are drilled in the pipe to install tuyeres. A hole is made in the disc from the rotary mower to match the diameter of the pipe. The disk and pipe are welded together. A can is welded on top, as well as pipes for air supply and gas exhaust.
A fire extinguisher is needed to make a centrifugal type cleaner. Two pipes are welded to it - on top and on the side, and the fire extinguisher itself is welded to a barrel that does not have a lid or bottom. In the barrel, in the lower part, a hole is cut to collect ash and closed with a screw plug.
A welded structure of a pipe and a can is installed in a barrel. The supports are first welded to the disk and an ash pan made from a kettle is hung on chains from below. A barrel lid with a hole pre-cut in it is installed on the can.
A cooler is constructed from a low-temperature battery and connected to the finished structure using flanges. Be sure to make a hole to drain condensate.
The filter is made from two metal paint buckets. They are placed on top of each other and welded. Holes are made in the bottom. The upper one is filled with mineral wool, and the lower one with expanded clay.
A fan for ignition can be made from a tractor stove. It is installed in the front area of a motorcycle sidecar with a subframe and connected to the system using polymer pipes. Two ball valves are installed as gas flow regulators: one to the ignition fan, the other to the mixer. The mixer is located in front of the carburetor and connected to the distributor. A manifold made of steel pipes is constructed under the carburetor.
The hopper for solid fuel is fixed inside the housing or a part of the gasgen housing is allocated for this purpose, separating it with metal sheets.
It is worth welding legs to the bottom of the barrel, which will ensure the stability of the structure.
It is necessary to carefully seal the gasgen assembled with your own hands, because the absence of uncontrolled access to oxygen is the main condition for the correct operation of the device.
Thermal generator stove - heating, hot water and electricity from wood
Hello everyone, I propose for consideration an interesting design of a wood-burning stove that you can make with your own hands.
The design feature is that the oven is capable of generating electric current to charge a mobile phone and other devices; Peltier elements are responsible for this. Water serves as the coolant in the furnace, although it can easily be replaced with oil or other liquid. This means that you can connect batteries to such a stove and heat the room, as an example. With the help of such a stove you can easily and simply get hot water. The maximum power produced by Peltier elements is 10 Watts, and the maximum voltage is around 15 V. If you need higher power and voltage, you can install more Peltier elements. Let's take a closer look at how such a stove works and how to make it.
Materials and tools used by the author:
List of materials:
— ready-made housing for the furnace (or sheet steel, corner and other materials); - steel pipes; - chimney; — car radiator (from Volga or another, preferably larger volume); — Peltier elements (the author has 14 pieces); - thermal paste; — sheet aluminum: — fum tape; — square steel pipes (for heat exchangers); - water hose; — hydraulic valve (to relieve excess pressure); — tees for water supply; — battery, electronics for voltage control (and the like if desired).
List of tools:
- Bulgarian; - welding machine; - lathe; - drill; — broken keys.
Furnace manufacturing process:
Step one. Manufacturing of the furnace body
The oven body is made of metal; the author used an old container for such purposes. You can make a similar stove from sheet steel, old gas cylinders, and so on; you can simply upgrade the potbelly stove you already have.
We install the door, as well as the chimney. We make sure to make a valve in the chimney, and we make the oven door so that it closes hermetically. This is necessary in order to quickly extinguish the stove if necessary. If the Peltier elements overheat, they may fail.
The author's oven is small in size, but to get more heat, you can make a larger oven.
Step two. Manufacturing of heat exchangers
Next, we need to make three heat exchangers, one of them will be hot and the other two will be cold. Our Peltier elements will be located between the heat exchangers. To manufacture such parts, we will need square pipes of a suitable cross-section, according to the dimensions of the Peltier elements. We weld pipes to the pipes, one will be incoming and one outgoing. We weld the ends of the pipes well; the welds must withstand a pressure of at least 2 bar.
Step three.
Heating circuit A heating circuit is installed inside the furnace; our water will circulate in it, heated by coals and flames. To make this circuit, you will need steel pipes; we weld them into a structure like the author’s; everything must be sealed and must withstand high pressure. Of course, the design of the circuit may be different; the larger the heated area, the more efficiently the stove will heat the water.
Step four.
Assembling the stove Everything is almost ready, you can assemble the stove. We install the door, and install the heating circuit inside the oven. We weld the heating circuit to the furnace body so that it does not move. We also weld the legs to the stove; the author made them from round pipes, welding the ends with sheet steel.
Step five. Assembling the “sandwich”
This concept refers to the installation of Peltier elements on the furnace. In total, the author used 14 Peltier elements for his purposes; to install them you will need sheet aluminum and thermal paste. First, we determine which side of the element is hot and which is cold, we check this by connecting the element to the battery. Well, then we install the elements on sheet aluminum using thermal paste. You should have two blocks of 7 pieces. We install these blocks between the heat exchangers, the hot one is in the center, and the two cold ones are on the sides. The heat exchangers are tightened with steel clamps to securely press the elements to the heat exchangers.
We connect Peltier elements in series or parallel, depending on the current and voltage you want to receive.
Step six. Final assembly and testing
We install the stove in the right place and connect a radiator to it; it will be responsible for cooling the cold heat exchangers. It is better to take a larger radiator; it will work well from a Volga or a truck. Water will circulate naturally through the radiator when it is heated in the heat exchanger. Fill the radiator with water.
If the system is equipped with good batteries and smart electronics, quite good reserves of electricity can be stored from firing the furnace. Good luck and creative inspiration if you decide to repeat something similar! Don't forget to share your DIYs with us!
Source
Become the author of the site, publish your own articles, descriptions of homemade products and pay for the text. Read more here.
Criterias of choice
Due to the fact that the wood-burning autonomous electric generator exists in several versions, the user’s choice is simplified. Since only a generator stove is suitable for the home, there are no other options. And large wood-burning power plants are used to supply power to industrial or civil facilities, since their power varies between 100-200 kW.
When choosing, you should take into account the size of the facility that will be served, as well as what power you should expect. To determine the amount of fuel consumption, you need to plan with what degree of efficiency and how often the device will be used, based on this, the volume of the loading container for firewood is selected.
Existing models
Fully functional, high-performance equipment such as the BioKIBOR power plant is quite expensive. If a wood-burning generator was chosen for the facility, then you can buy it within the amount of 2,000,000 rubles. By design, this is a modular installation with automatic fuel supply. To provide 100 kW equipment with firewood for one day, 5 tons (or 200 kg per hour of operation) will be required. The specified amount of fuel is required for full operation of the station.
Let's watch a video about the Indigirka wood-burning stove-generator model:
A device such as a wood-burning stove-generator (Indigirka brand Termofor) will cost the user approximately 30,000 rubles. When purchasing, the capacity of the combustion chamber is taken into account (41 liters), with a maximum load of 30 liters. To remove combustion products, a chimney is provided, the diameter of which is 80 mm and the height is 3 m. The output voltage is 12 V and the power is 60 W.
General recommendations
Wood-burning generator for charging your phone
To maintain a high temperature, it is necessary to ensure that there is enough fuel in the combustion chamber. If this is not necessary in the case of an automated power plant, then the furnace-generator does not have the function of autonomous fuel supply.
Such a device must be operated with a chimney that removes combustion products, especially if the operation is carried out indoors.
As an alternative to expensive equipment, you can make a backup electric generator using wood with your own hands. But this design also implies the use of a Peltier element. Without this, it is problematic to organize the conversion of temperature into electricity. According to users, a compact stove-generator is fully justified, especially in the context of the current decline in the price of such a unit and the availability of solid fuel.
Thus, the operation of a low-power household electric generator is an alternative to high-performance gasoline and diesel devices. But before purchasing, you should consider such a thing as the need to purchase an inverter to convert the output voltage of 12 V to 220 V. Without this, it will be impossible to connect most modern devices
Wood-burning electricity generator ZIS-21
In the atomic age you have to somehow turn around so as not to sit in the evenings without light. There is a lot of energy, as well as money, in the world around us; you just need to come up with a mechanism for honestly taking it all away or take ready-made technology.
The inventors have created a device that can be installed on a car and run on gas, fueling the generator with firewood. If you place this mechanism on the ground, it will easily generate electricity. A generator assembled in this way produces more than 50 kW of electricity.
A 50-liter container holds a refill for 20 kg of firewood (and a bag of finely chopped logs 6 by 6 cm). The weight of such a gas generator is 60 kg. If you use a 90 liter tank, hiding it in the trunk, filling it is enough for a range of 120 km.
More on the same topic
Pilot race
Steam engine-generator 16 KW on wood
Steam engine is a drive for an electric generator. It is powered by a small high-pressure boiler (up to 60 bar) using solid fuel. Small power plant for 16 KW using wood and coal. A steam engine with a solid fuel boiler allows you to obtain an autonomous power supply in almost any conditions. Small – alternative power generation in action. The fuel for the boiler of such a small power plant can be any solid fuel - wood. coal, peat, any flammable waste, etc. Ie. The steam engine is omnivorous and can extract electricity from any combustible material - even straw and dung.
In addition to electricity, it will also provide a lot of hot water for heating.
izobreteniya.net
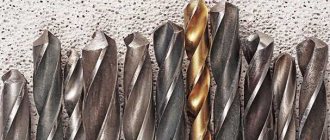
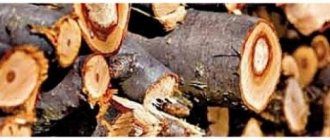
What kind of firewood is needed for a generator?
Any standard options for conventional ovens are suitable here. This can be wood chips, branches, firewood and even wood waste. The main thing is that the firewood must be of the right size.
To simplify the process of chopping firewood to the desired size, an unusual tool for chopping firewood - a standard “kolundrov” wood splitter will help. This kind of wood splitter is safe because it is simply impossible to get hurt by a wood splitter. The cleaver is suitable for use by almost anyone who wants to practice splitting firewood, including older people and women.
The operating principle is extremely simple. It is enough to place the log in the ring of the cleaver and hit it from above with a sledgehammer or something heavy. Unlike an axe, the impact force is concentrated in one place, which inevitably leads to splitting even damp and knotty logs. Heating a house is no longer a problem, since even a pensioner can handle chopping firewood with a good “kolundrov” wood splitter.
Wood-burning generators also become common equipment for modern fishermen and hunters, summer residents and hikers. After all, completely abandoning civilization in the forest is not very convenient.
Selecting and purchasing a firewood splitter for any type of generator will greatly simplify the process of procuring the necessary fuel and will take much less time.
Power plant diagram and creation instructions
If the desire to create a gas generator with your own hands overcomes any fears, before starting work you need to disassemble the installation diagram and also take care of preparing the component parts. So, let's look at how to create a gas generator of horizontal and vertical type. There is no fundamental difference in the designs, however, the method of generating gas still has its own characteristics.
Gasgen 100 kW, made independently
Vertical gas generator
The power plant diagram is shown in the picture. It is called vertical because during the combustion process the emitted gas rises vertically upward, from where it is taken through a pipe to the filters and radiator. As you can see, it is not difficult to assemble the structure.
This will require:
- A metal barrel will serve as a firebox for burning fuel (coke, coal or wood), and also combine other elements:
- firebox - located at the very top, serves for the fuel combustion process, has a sealed lid;
- grate - located at the bottom, where waste from processed fuel - ash and ash - falls;
- air distributor - located outside the housing, supplies oxygen, which enhances combustion;
- pipe - serves as a gas outlet and its distributor into the cleaning compartment (filter).
- Radiator – cools the gas obtained as a result of pyrolysis.
- Two filters - one is required to purify the oxygen supplied to the furnace (it is oxygen that allows you to increase the combustion temperature to 1000 ° C), while the other filters the directly produced gas, purifying it from tars, impurities and decomposition products.
- Fan - you can do without it, but its purpose is to cool structural parts that are heated during the fuel combustion process.
- Pipes are necessary to connect all parts of the gas generator to each other.
When working, you may need a welding machine, as well as skills to work with it. The gas generator can operate not only on coke and wood, but also on manure, which significantly reduces its cost.
When all the necessary parts have been collected, you can begin assembly, following the following instructions :
- We assemble the body - we take either a ready-made metal barrel or cook it from sheet metal. We install grates at the bottom, similar to a conventional coal stove. The largest part will be occupied by the firebox, where the process of combustion and pyrolysis (decomposition of charcoal into gas and resins) will take place. We close the firebox with a sealed neck that separates it from the body. We install the air distributor outside the housing so that the supplied oxygen cannot penetrate back (a one-way valve will be needed).
- We install the radiator and filters.
- We connect the structural parts as shown in the drawing.
- Let's try the resulting invention in practice.
The device can be used both in open areas and in the basement floors of premises. With its help, you can not only provide AC power to your home, but also perform other housework.
If the skills to create such a unit are not enough, it is recommended to watch the video, which explains in more detail all the features and nuances.
The plot of "Main Road" about the production of gasgen
Horizontal gas generator
A DIY wood-burning gas generator has its own characteristics. It differs in the method of removing gas, which moves in the lower part of the body in horizontal flows.
The most suitable fuels are firewood and compressed sawdust. The design of the power plant is a little simpler: the housing with the combustion hopper, grate bars, air distributor and gas outlet are located in one line. So, in order to make a horizontal type gas generator, you need to prepare :
- The housing in which the bunker, air duct and gas distribution chamber will be placed.
- Combustion chamber equipped with a sealed neck.
- Filters where fuel combustion products will settle, producing clean gas at the output.
The assembly principle is identical to the vertical gas generator, so if difficulties arise, it is recommended to use the video resource tips, which describe in detail each step of creating the unit.
The video shows how to make a gas generator yourself
Method No. 2
When creating a gas generator for a car, the main emphasis is not only on the reliability and efficiency of the device, but also on its compactness.
Abroad, the cooling filter, cyclone and housing part are made of stainless steel, which allows the use of metal that is half as thick.
Naturally, this design turns out to be much easier. In our conditions, to reduce the cost of construction, old propane cylinders or fire extinguishers are used.
Liquefied propane cylinders are often used to make external containers.
The internal part is made from the receiver of a truck, for example, KAMAZ or ZIL.
POPULAR WITH READERS: Google self-driving cars
Particular attention should be paid to the grate - it is made of thin metal, and the pipes are made of ordinary pipes (the main thing is to choose the right diameter).
The upper part of the cylinder is used to make a cover with fasteners. As a last resort, the part can be made of sheet steel.
The lid is sealed using a special cord treated with graphite impregnation and made of heat-resistant asbestos.
To make a coarse filter, you can use an old fire extinguisher or do it even simpler - take a piece of pipe.
At the bottom there should be a cone-shaped nozzle necessary for unloading ash.
At the top, the end must be tightly closed with a lid (as a rule, it is welded).
An outlet pipe is installed in the cover itself, and on the side there is another fitting for supplying combustion products.
The gases released by the gas generator have a high temperature, so they require high-quality cooling.
There are two reasons for this:
- firstly, gases heated to high temperatures have a minimum density, which makes the process of burning them in internal combustion engine cylinders almost impossible;
- secondly, there is a risk of a spontaneous outbreak if the gas comes into contact with hot engine elements.
During the ignition process, it is important to ensure normal gas movement along the path - this work is performed by the fan.
After the engine starts, the working composition moves due to vacuum, so there is no need for a fan.
Standard heating radiators can be used as a cooler. The main thing is to position them correctly and ensure maximum contact with air masses.
In some cases, installation of bimetallic radiators is allowed.
Gas fuel must be cleaned before being supplied to the engine - this is ensured using special filters.
We must not forget about another important element - the mixer. With its help, the volume of the supplied gas-air mixture is regulated. The adjustment is made using the damper.
Equipment startup and operating tips
Before starting the gas generator, the combustion chamber must be cleared of ash. Check the opening of the chimney damper - it should be half open. After this, the wood is laid and ignited. These actions are similar to the actions when firing conventional home stoves.
To increase the service life of the device, it is recommended to regularly clean the combustion chamber and chimneys. If this is not done, then very soon one of the elements of the gas generator will fail due to overheating. In order to monitor the temperature, sensors are installed in the upper part of the boiler and in the middle of the pipeline.
Sealing also plays an important role. Since moisture ingress can lead to extinguishing the fire, and excess air will reduce the pressure in the system.
In order for your homemade wood-burning gas generator to work correctly, it is necessary to adjust the air supply, gas exhaust and other processes. When manufacturing a unit, it is best to use drawings based on engineering calculations that take into account indicators such as fuel combustion area, etc.
Some craftsmen came out of the situation in a different way: they made a copy of the gas generator, which is already working successfully, precisely observing all the proportions. A finished wood-burning gas generator can be installed both outside a residential building and in the basement.
Connecting and starting the internal combustion engine
Since the calorific value of fuel generated from firewood is much lower than that of gasoline, the air/fuel ratio must be changed for normal engine operation. To do this, you will have to make a mixer and place it on the intake tract. The simplest type of mixer is an air damper controlled by a draft from the passenger compartment.
Starting a cold engine on wood is quite a task. Therefore, you should not completely abandon gasoline, but supply it only during startup, and then switch to fuel produced by gas. To implement switching to different types of fuel, make a mixer according to the scheme proposed in the book by I. S. Mezin “Transport gas generators”:
Note. In this book you will find a lot of useful information regarding the production of gaseous fuels from various types of wood and coal.
Now about the features of starting and operating internal combustion engines on wood and coal:
- the size of firewood loaded into the bunker should not exceed 6 cm;
- raw wood cannot be used, since all the heat generated will be used to evaporate water and the pyrolysis process will be extremely sluggish;
- ignition is carried out through a special hole with a check valve with the fan turned on no later than 20 minutes before the trip;
- engine power is reduced by about 50% compared to driving on gasoline;
- It follows from the previous paragraph that the service life of the engine on homemade fuel is also reduced.
It is noteworthy that after short-term parking, the car starts easily from the gas engine, without switching to gasoline. After a long period of inactivity, it will take 5-10 minutes to re-ignite the unit. How to start a car engine from a homemade wood-burning gas generator, see the following video:
Tips for use
It is better to install the gas generator in a special insulated room
Gas generators, as well as heating boilers operating on the principle of a gas generator, are installed inside residential buildings, in specially designated rooms - basements and ground floors. In addition, they can be placed outdoors. The location is selected depending on the type of boiler and the features of its design. Pyrolysis boilers are often installed inside the house, since their maintenance does not generate much waste. In addition, the fuel is quite light and there are no special problems with its movement.
Gas generators that burn wood, coal, and especially those designed for burning long logs, are best installed outside the house: it will be easier to clean the device from ash and load firewood. In addition, gasgen installed outdoors is more fireproof.
If the boiler is located outside the house, it is necessary to perform bulk thermal insulation so that the ambient temperature does not in any way affect the operation of the gas generator. It is recommended to protect the control system with a casing with a lid to prevent precipitation from getting inside. If the gas generator is used as a heating boiler, gas exhaust pipes are laid in the ground to avoid significant cooling of the gas mixture.
It is recommended to connect the chimney in the opposite direction to the direction of smoke movement, then fewer burning particles and resins will accumulate on it.
The space around the boiler must remain free because it gets very hot.
How to make a brick oven with your own hands
How realistic is it to build a brick oven with your own hands? It's difficult, but possible. You are unlikely to succeed in creating a work of art: all the decorations, protrusions and frills require practice and skill, and where do beginners get them? So, to begin with, choose the simplest project. And one more piece of advice: if you are planning to install a stove for your home, it is better to first practice at your dacha, village, etc. Having passed the stove through your hands once, you will understand what is what, the second time you will act more consciously and as a result you will make fewer mistakes. Well, now, in order, what to do and why.
Decide on the type of oven: channel or bell-type. Find a suitable project. Ideally, it fits you without modifications. If not, adjust it to your needs and, if possible, consult a specialist. Draw each row of the order.
Furnace order - image of each row of masonry
Next came the housekeeping chores: counting the number of bricks, adding a reserve for combat and rejection (10% of the required quantity). Look for a brick that meets your needs. For external masonry, solid ceramic bricks of at least M150 are used; for the firebox, fireclay bricks are often (but not always) required. There are two options Sh-5 and ShB-8. Other brands are almost never used.
Find clay for mortar and mixtures for laying fireclay (you can’t put everything on fireclay mortars, they are designed for different temperatures). You purchase furnace castings of the required formats and purposes. You will also need thermal insulation materials: recently, the firebox is often separated from the outer masonry by a layer of cardboard made of mineral wool. Whether you need it or not, decide for yourself. But for normal embedding of furnace casting into masonry, it needs to be wrapped in a heat insulator, so you will need a certain amount of basalt wool (use temperature is 1200°C and above). You can read about how to prepare a clay-sand mortar here.
Actually, the beginning of the construction of the furnace begins with the construction of the foundation. If you planned it in your house/dacha in advance, you had to make the foundation along with the foundation of the house. If not, you will have to make a disconnected foundation, which is 30 cm larger in size than the size of the selected furnace.
Construction of the furnace begins with the foundation
After it has settled, cover it with two layers of moisture insulator (roofing felt in its simplest form) and begin building the stove. Next, everything is according to the order that you have. And one more thing: if you were hoping to build the stove in a few days, you need to be disappointed. This is a long process, taking several weeks. And this is for experienced people. And for beginners, it takes 3-7 weeks to build brick heating stoves with their own hands, depending on the size.
And one more piece of advice. Before you start laying on the solution, put everything “dry”. Simply armed with order, place the bricks one on top of the other. This way you will have a clear idea of what should be done and why, how and where to trim the bricks (you can’t do without this). But start cutting only when you are already placing it on the solution. When laying on the mortar, be sure to check each row for verticality and horizontality, watch the corners and correct the slightest discrepancies.
The stove is placed on a clay mortar, checking each row for horizontalness and the walls for verticality, tracking the angles
After the stove is folded, it must be dried. Even if you are not going to heat it regularly in the near future. You will not only be convinced of the performance of your brainchild, but also make it a monolith: when exposed to high temperatures, the clay fuses with the brick. If it dries as usual, then it is still unknown how it will behave later.
Here are the main steps that will help you build a stove with your own hands. Difficult? Yes! But there are other oven options that you might like that are much easier to make. For example, a small rocket heating stove that uses the principle of pyrolysis, but does not require a super-complicated firebox and high costs.
The basics of brick processing and laying can be seen in this video. The process of laying a bell furnace is filmed in this video. The video is long, but you can see many subtleties and features.